


Chocolate curls transform simple desserts into sophisticated showpieces worthy of fine dining establishments. Learning how to make chocolate curls for garnish elevates your pastry presentations dramatically, adding professional three-dimensional elements that create height, movement, and architectural interest. This guide explores six proven techniques for making chocolate curls, from beginner-friendly vegetable peeler methods to advanced professional techniques that create dramatic spirals and tightly rolled cigarettes.
Why Chocolate Curls Are Essential
Chocolate curls provide dimensional elegance that distinguishes professional presentations from home-style desserts. Unlike flat shavings, curls create height and catch light beautifully, adding sophisticated visual appeal that photographs exceptionally well for today's social media-focused celebrations.
The versatility of chocolate curls makes them invaluable across diverse dessert styles—from rustic cakes to elegant wedding presentations to modern plated desserts. Cost-effectiveness is another advantage: homemade chocolate curl garnishes cost a fraction of store-bought alternatives while offering superior freshness and customization. Plus, failed curls can be re-melted and tried again—nothing is wasted.

Understanding the Science Behind Perfect Curls
Success in making chocolate curls depends on understanding chocolate's crystalline structure and how temperature affects its physical properties.
The Bendability Zone: When chocolate reaches 65-68°F, cocoa butter maintains enough solidity to hold shape while retaining sufficient flexibility to bend rather than break. This narrow temperature window is key to creating perfect chocolate curls.
Tempered vs. Untempered: Tempered chocolate produces curls with glossy appearance and resistance to melting. Untempered chocolate works for immediate use but may develop bloom (white streaks) over time.
|
Factor |
Impact |
Optimal Range |
|
Temperature |
Controls bendability |
65-68°F |
|
Cocoa butter content |
Higher = better formation |
32-39% |
|
Bar thickness |
Thicker = longer curls |
Min. 1/2-inch |
|
Humidity |
High causes stickiness |
Below 50% |
Essential Tools and Materials
Vegetable Peelers: Most accessible tool for chocolate curls. Y-shaped peelers offer comfortable grip; straight peelers provide more control. Sharp blades are essential.
Professional Tools: Bench scrapers and offset spatulas create oversized dramatic curls. Quality decorating combs and scrapers deliver superior results. Explore specialty tools for professional chocolate work.
|
Tool |
Best For |
Skill Level |
Key Benefit |
|
Vegetable peeler |
Medium curls |
Beginner |
Most versatile |
|
Bench scraper |
Large spirals |
Advanced |
Dramatic results |
|
Cheese planer |
Uniform thin curls |
Beginner |
Consistent thickness |
|
Specialized curler |
Precise curls |
Intermediate |
Adjustable settings |
Additional supplies: parchment paper, airtight containers, cotton gloves. Invest in quality pastry baking tools for reliable performance.
Choosing and Preparing Chocolate
Best Chocolate Types
Premium fine chocolate with 32-39% cocoa butter produces superior chocolate curls with better workability and appearance.
Chocolate Characteristics:
- Dark (60-70%): Most forgiving; holds shape reliably; dramatic contrast
- Milk chocolate: Sweeter; softer texture; needs cooler temperature
- White chocolate: Most temperature-sensitive; stunning visual appeal
Bar Requirements: Choose bars at least 1/2-inch thick for substantial curls. Thin bars produce only tiny curls with limited impact. Quality chocolate ensures consistent results.
Proper Preparation
Temperature Testing: Remove chocolate from refrigeration 15-20 minutes before working. Test readiness by drawing a peeler across a corner. If it crumbles, it's too cold (warm in hands 30-60 seconds). If it smears, it's too warm (refrigerate 5-10 minutes).
Environment: Work in 68-72°F spaces. High temperature causes rapid warming; high humidity makes chocolate sticky. During warm weather, work in cooler hours or refrigerate chocolate frequently.
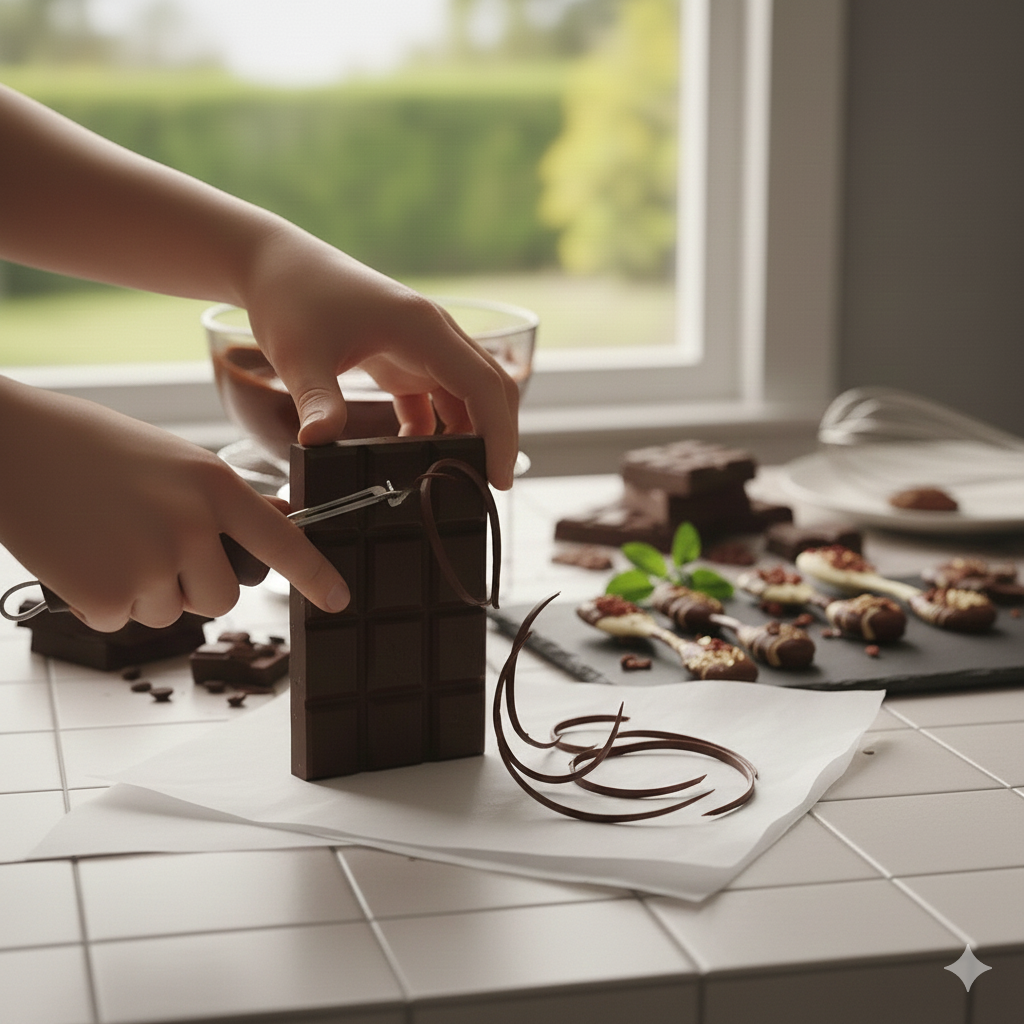
Method 1: Classic Vegetable Peeler Curls
The most popular technique for how to make chocolate curls for garnish, producing elegant results with minimal practice.
Quick Steps:
- Wrap chocolate in towel; hold firmly in non-dominant hand
- Position peeler at 20-30° angle against flat side
- Apply firm pressure; draw toward you smoothly
- Allow curl to form naturally
- Transfer with toothpick—never fingers
|
Curl Style |
Temperature |
Pressure |
Angle |
Best For |
|
Tight compact |
62-64°F |
Firm |
35-45° |
Elegant plating |
|
Loose flowing |
66-68°F |
Light |
15-25° |
Dramatic impact |
|
Medium classic |
65-67°F |
Moderate |
20-30° |
Versatile use |
Troubleshooting: Breaks = too cold (warm it). Smears = too warm (cool it). Sharp blades are crucial for consistent results.
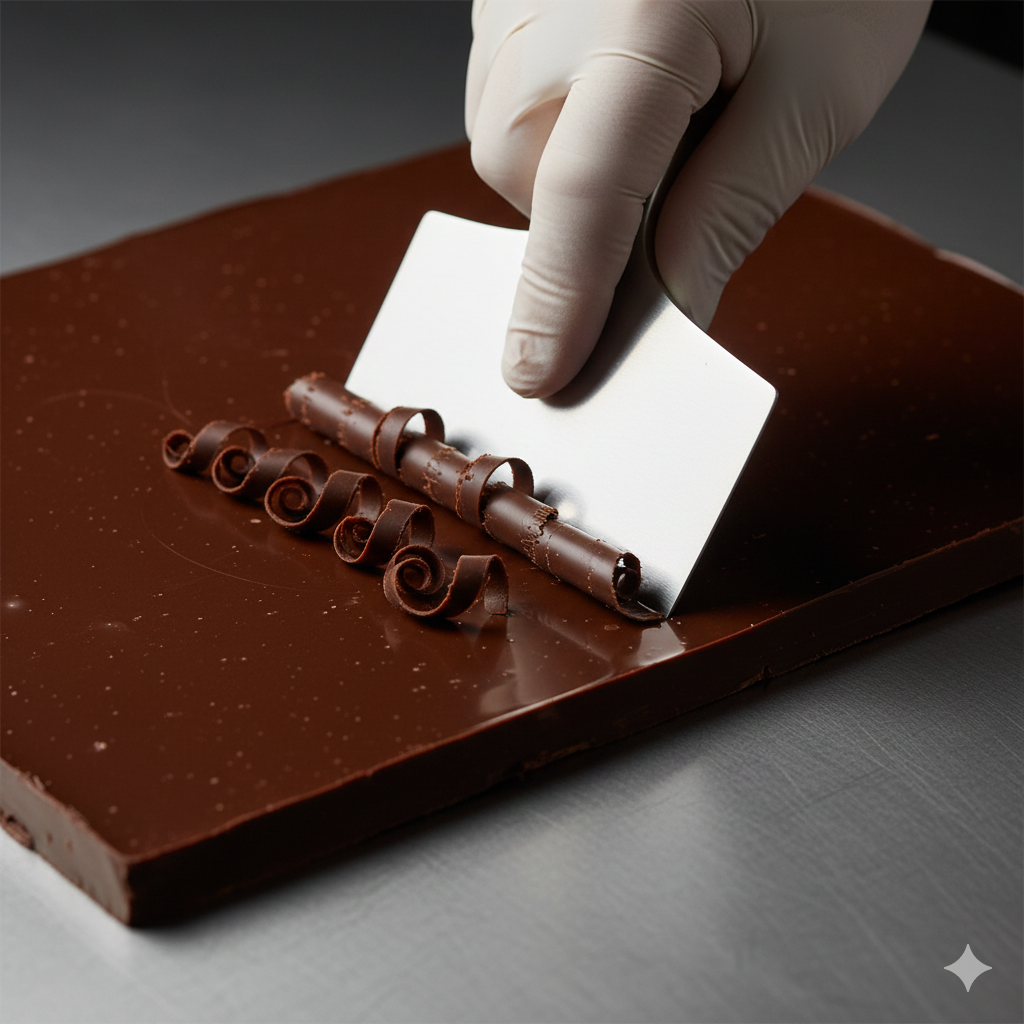
Method 2: Large Block Scraping Method
Advanced technique creating oversized, dramatic chocolate curls for showstopping centerpieces.
Process: Melt premium chocolate to 90-95°F. Pour onto marble slab or cool baking sheet. Spread to 1/8-inch thickness. Allow to set until surface loses shine but feels tacky (5-10 minutes).
Perfect Timing: Test by touching a corner—should feel cool and tacky, not wet. This precise moment is crucial.
Scraping: Hold bench scraper at 45° angle. Apply firm pressure and push confidently across chocolate in one smooth motion. Chocolate curls upward naturally, creating 6-8 inch spirals.
When to Use: Reserve for special occasions—weddings, milestone celebrations, competition cakes. The impressive results showcase true pastry artistry.
Method 3: Chocolate Cigarettes
Elegant chocolate cigarettes are tightly rolled cylinders adding sophisticated French pastry flair.
Technique: Use chocolate at 64-66°F. Spread melted chocolate thinly (1/16-inch) on cool surface. Allow to set until tacky. Hold spatula at 30-35° angle and push firmly—chocolate curls tightly into cylindrical scrolls.
Uniformity: Mark chocolate surface with guide lines before setting for identical lengths. Use ruler for perfectly uniform results.
Presentation: Arrange vertically around cake edges for classic appearance, or lay horizontally in neat parallel rows. Their refined look suits formal celebrations.
Method 4: Two-Tone Marble Curls
Layering: Pour white chocolate onto parchment (1/8-inch thick). Before setting, drizzle dark or milk chocolate over surface. Swirl gently with toothpick. When reaching working temperature, create curls using bench scraper method.
Color Contrast: Two-tone chocolate curls provide striking visual interest. Use dark swirled into white for maximum contrast, or combine milk and dark for subtle sophistication.
Visual Impact: Works beautifully on monochrome cakes or complex desserts. Particularly stunning on wedding cakes where elegance matters.

Method 5: Frozen Chocolate Block Method
When to Use: During hot weather or when creating extra-long chocolate curls requiring maximum stability.
Process: Freeze thick chocolate block for exactly 15-20 minutes. Remove and immediately create curls using sharp peeler with firm pressure. Frozen chocolate produces longer curls before warming.
Work Quickly: Create 5-6 curls, then return block to freezer for 5 minutes before continuing. This maintains optimal temperature.
Best Results: Produces extra-long curls (8-10 inches) perfect for dramatic vertical arrangements or "nest" effects.
Method 6: Piped Chocolate Curls
Creative Flexibility: Piped chocolate curls offer unlimited design possibilities—spirals, zigzags, waves, or any pattern.
Technique: Fill piping bag with chocolate cooled to 85-90°F. Pipe thick lines onto acetate sheets in desired patterns. Before setting, wrap acetate around cylindrical form (rolling pin, wine bottle). Secure with tape and refrigerate 10-15 minutes.
Advanced Options: Pipe multiple parallel lines for ribbed curls. Create lattice patterns for intricate designs. Dust with spray colors before setting for metallic finishes.
Release: Once set, peel away acetate carefully. Chocolate retains curved shape, creating architectural elements impossible through traditional scraping.
Perfecting Curl Sizes and Shapes
Controlling Variables: Curl tightness depends on temperature (cooler = tighter), pressure (firmer = tighter), and angle (steeper = tighter). Adjust systematically for desired results.
Creating Uniformity: Maintain identical pressure, angle, and temperature throughout. Sort finished curls by size and use only matching pieces for professional presentation.
Mixing for Dimension: Combine sizes for depth—small tight curls as base, medium for body, large as focal points.
|
Dessert Type |
Curl Style |
Size |
Arrangement |
|
Formal layer cake |
Uniform cigarettes |
4-6" |
Vertical edges |
|
Rustic cake |
Mixed loose curls |
Varied |
Random, organic |
|
Plated dessert |
1-2 dramatic curls |
6-8" |
Vertical height |
|
Cupcakes |
Small-medium |
2-3" |
Centered |
Explore chocolate decorations and cake pastry decorations for complementary garnishes.
Storage and Handling
Containers: Use rigid, shallow, airtight containers with parchment paper. Single layers prevent crushing. Fill empty spaces with crumpled paper towels to prevent shifting.
Conditions: Store at 60-65°F with humidity below 50%. Avoid refrigeration unless necessary—temperature fluctuations cause bloom. If refrigerating, seal completely and warm to room temperature before opening.
Longevity: Tempered curls last 2-3 weeks; untempered use within one week. Make 1-3 days ahead to reduce stress.
Handling: Always use toothpicks, spatulas, or cotton gloves—never bare fingers. Body heat causes immediate melting and fingerprints.

Creative Applications
Cake Decorating: Press small-medium curls into frosted sides for coverage. Create borders by arranging uniform curls in overlapping patterns. Insert large curls vertically for height.
Plated Desserts: Use 1-3 carefully selected curls as focal points rather than excessive coverage. Position to create height and lead the eye.
Chocolate Nests: Arrange long, loose curls in circular, overlapping patterns. Fill with berries, mousse, or ice cream for stunning presentations.
Combining Garnishes: Pair with fresh berries, edible flowers, gold leaf, or mint. Limit to 2-3 total garnish types for sophistication.
Troubleshooting Common Problems
|
Problem |
Cause |
Solution |
|
Breaks instead of curling |
Too cold; dull blade |
Warm 30-60 seconds; sharpen peeler |
|
Won't hold shape |
Too warm |
Refrigerate 5 minutes; firmer pressure |
|
Melts during handling |
Body heat |
Use toothpicks; wear gloves |
|
Inconsistent sizes |
Variable technique |
Practice consistency; sort by size |
|
Sticks to scraper |
Wrong temperature |
Adjust temp; clean tools |
Key Insight: Temperature issues cause 80% of problems. Always check temperature first when troubleshooting.
Pro Tips for Quality Results
Essential Techniques:
- Maintain workspace at 65-68°F
- Wear clean gloves to prevent heat transfer
- Make 20-30% extra curls—select only the best
- Work in focused 15-20 minute sessions
- Create curls days ahead to spread workload
Quality Control: Inspect each curl before storing. Discard broken or bloomed pieces immediately for impeccable final presentation.
Conclusion
Mastering how to make chocolate curls for garnish transforms dessert presentations from simple to sophisticated, giving you skills to create professional decorations that rival high-end bakeries. From beginner-friendly vegetable peeler chocolate curls to advanced piped spirals and dramatic cigarettes, these six methods provide comprehensive capabilities for any occasion. Success hinges on understanding temperature sensitivity, selecting quality chocolate, using sharp tools, and practicing before important applications. Whether decorating wedding cakes, plating desserts, or adding elegant touches to everyday treats, chocolate curls deliver stunning visual impact. Ready to create show-stopping decorations? Explore premium chocolate, professional tools, and complete supplies at Zucchero Canada to support your journey toward chocolate artistry that transforms every dessert into an unforgettable centerpiece.
References
Callebaut. (2023). Advanced chocolate decoration and curling techniques. Barry Callebaut Group.
Figoni, P. (2022). How baking works: Exploring the fundamentals of baking science (4th ed.). Wiley.
Greweling, P. (2023). Chocolates and confections: Formula, theory, and technique for the artisan confectioner (3rd ed.). Wiley.
Suas, M. (2022). Advanced bread and pastry: A professional approach (2nd ed.). Cengage Learning.


Leave a comment
All comments are moderated before being published.
This site is protected by hCaptcha and the hCaptcha Privacy Policy and Terms of Service apply.