


Chocolate flowers represent the pinnacle of edible cake decoration, transforming ordinary desserts into breathtaking botanical masterpieces. Learning how to make chocolate flowers gives you the skills to create stunning, realistic blooms that captivate guests while tasting infinitely better than inedible decorations. This comprehensive guide explores five proven techniques for making chocolate flowers, from beginner-friendly modeling chocolate roses to advanced painted orchids that showcase true artistry.

Why Chocolate Flowers Are the Ultimate Cake Decoration
Chocolate flowers provide unmatched elegance and sophistication that elevates cake presentations from simple to spectacular. Unlike real flowers that wilt and aren't edible, or fondant flowers that taste bland, chocolate flowers offer the best of both worlds—stunning visual appeal with delicious flavor.
The versatility of chocolate flowers makes them suitable for any occasion. They complement rustic buttercream cakes, enhance elegant wedding tiers, and add modern flair to minimalist designs. Cost-effectiveness is another advantage—homemade chocolate flowers cost significantly less than professional sugar flowers while offering unlimited customization in colors, sizes, and styles.
Essential Materials and Tools
Success in how to make chocolate flowers depends on having appropriate materials and tools for your chosen technique.
Chocolate Selection: Premium fine chocolate or quality chocolate with high cocoa butter content works best. White chocolate is ideal for coloring, while dark chocolate creates dramatic contrast.
Modeling Chocolate vs. Tempered: Modeling chocolate (chocolate + corn syrup) handles like clay and holds shape perfectly for sculpted flowers. Tempered chocolate works for molded flowers and piped designs but requires temperature precision.
|
Tool/Material |
Purpose |
Essential? |
|
Modeling chocolate or quality chocolate |
Base material |
Yes |
|
Flower cutters (various sizes) |
Cutting petals |
For method 2 |
|
Silicone flower molds |
Creating 3D flowers |
For method 4 |
|
Small ball tool |
Shaping petals |
Yes |
|
Food coloring (oil-based) |
Adding color |
Optional |
|
Piping bags and tips |
Piping flowers |
For method 3 |
|
Parchment/acetate sheets |
Work surface |
Yes |
|
Foam pad |
Thinning petals |
Recommended |
Additional helpful items include toothpicks for detailing, clean paintbrushes for dusting, and airtight containers for storage.
Understanding Modeling Chocolate
Modeling chocolate is the secret to creating beautiful sculpted chocolate flowers that hold intricate shapes without melting.
Simple Recipe: Heat 1/3 cup light corn syrup until warm (not hot). Pour over 2 cups chopped chocolate (dark, milk, or white). Stir until smooth and glossy. Wrap in plastic wrap and let rest at room temperature for 2-4 hours until it reaches clay-like consistency.
Working Consistency: Properly rested modeling chocolate should feel like soft clay—pliable enough to shape but firm enough to hold form. If too soft, refrigerate briefly. If too stiff, microwave for 5-10 seconds and knead.
Storage: Wrap tightly in plastic wrap and store at room temperature for up to 3 months. Unlike fondant, modeling chocolate tastes delicious and works beautifully in various temperatures.
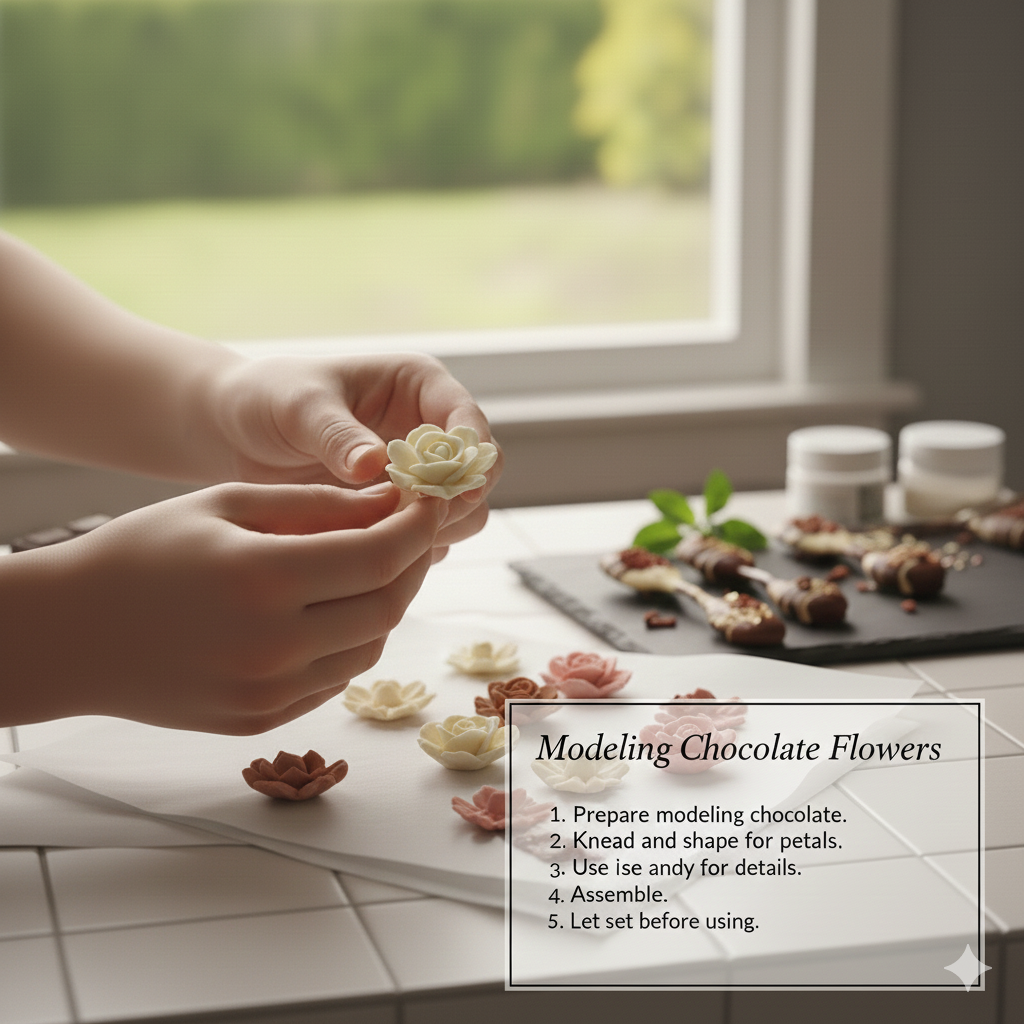
Method 1: Modeling Chocolate Roses
The classic technique for how to make chocolate flowers, creating elegant roses that look professionally crafted.
Creating the Center: Start by rolling a small amount of modeling chocolate into a teardrop shape about 1 inch tall. This cone becomes your rose center and provides structure for attaching petals.
Shaping Petals: Pinch off marble-sized pieces of modeling chocolate. Flatten each between your fingers or on a foam pad using a ball tool. Make petals thin with slightly thicker bases for strength.
Building the Rose:
|
Step |
Action |
Details |
|
1. Inner petals |
Wrap 3-4 small petals tightly around cone |
Keep these closed and compact |
|
2. Middle layer |
Add 3-4 medium petals, overlapping slightly |
Position slightly lower than inner petals |
|
3. Outer petals |
Attach 4-6 larger petals loosely |
Curl top edges back for realism |
|
4. Finish |
Pinch off excess at base |
Let rest 30 minutes to firm |
Color Ideas: Use white modeling chocolate tinted with colors for chocolate for any shade. Create ombre effects by using darker chocolate for inner petals, lighter for outer layers.
Best For: Wedding cakes, romantic celebrations, elegant focal points.
Method 2: Simple Blossom Flowers
Beginner-friendly technique creating charming five-petal blossoms quickly.
Quick Steps:
- Roll modeling chocolate to 1/8-inch thickness
- Cut shapes using flower cutters (various sizes)
- Place on foam pad; thin edges with ball tool
- Cup centers slightly for dimension
- Add small chocolate ball or colored center
- Let dry on curved surface for natural shape
Time-Saver: These chocolate flowers work perfectly for covering entire cakes efficiently. Create dozens in 20-30 minutes for impressive coverage.
Coloring: Tint modeling chocolate before cutting, or dust finished flowers with luster dust for shimmer.
Perfect For: Quick decorations, full cake coverage, casual celebrations.
Method 3: Piped Chocolate Flowers
Royal icing-style chocolate flowers using piping techniques, perfect for vintage aesthetics.
Setup:
- Melt chocolate to 85-90°F
- Fill piping bag with small petal tip (#104)
- Prepare parchment paper on flat surface
Piping Process:
|
Flower Type |
Technique |
Tips |
|
Roses |
Pipe center dot, add overlapping petals while turning parchment |
Hold tip at 45°, wide end at center |
|
Daisies |
Pipe 8-10 petals radiating from center point |
Quick pulls from center outward |
|
Five-petal |
Pipe 5 evenly spaced petals in circle |
Add center dot in contrasting color |
Finishing: Refrigerate piped flowers 10-15 minutes until set. Peel carefully from parchment using offset spatula. Attach to cakes with small dot of melted chocolate.
Best For: Vintage cakes, bridal showers, quick batch production.
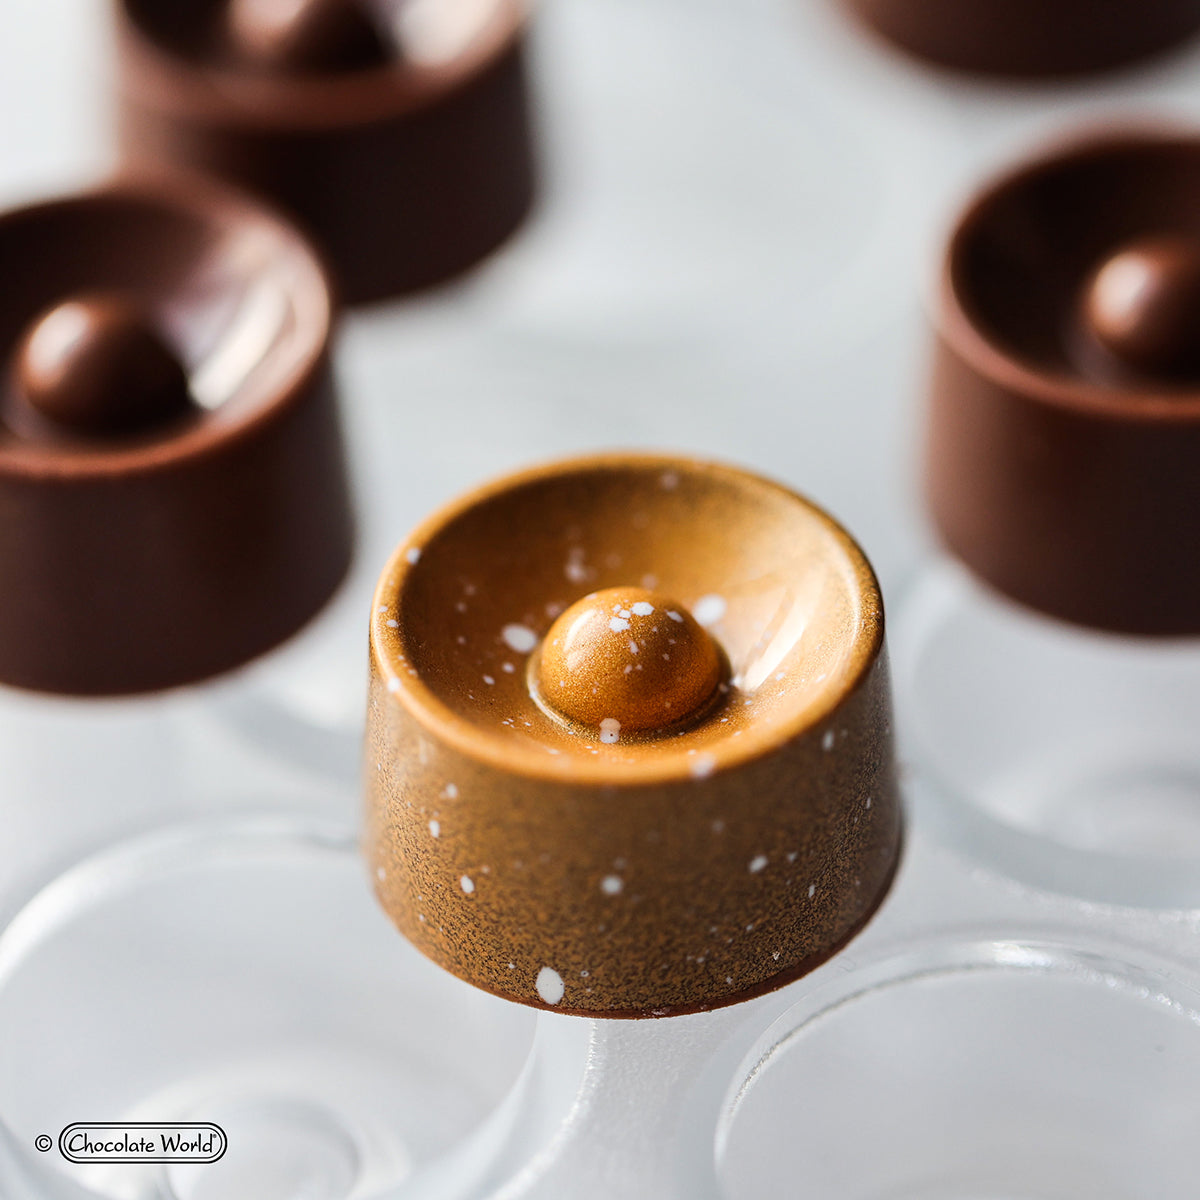
Method 4: Chocolate Mold Flowers
Professional chocolate flowers using silicone flower molds for consistent, realistic results.
Simple Process:
- Melt chocolate to proper temperature (88-90°F dark, 86-88°F milk, 82-84°F white)
- Pour or brush into clean, dry chocolate molds
- Tap mold firmly to release air bubbles
- Refrigerate 10-15 minutes until completely set
- Flex mold gently to release flowers
Why This Works: Quality molds capture intricate details—veins, textures, curves—automatically. No hand-sculpting skills required for professional results.
Mold Options: Browse 3D seasonal chocolate molds and polycarbonate chocolate molds for various flower styles.
Best For: Consistent results, commercial applications, time-sensitive projects.
Method 5: Painted Chocolate Orchids
Advanced technique creating hyper-realistic orchids showcasing true artistry.
Petal Creation:
- Roll modeling chocolate thin
- Cut 5 orchid petal shapes per flower:
- 2 narrow top petals
- 2 wide side petals
- 1 ruffled lip petal
- Thin edges on foam pad
- Curve over rounded surface to dry
Painting Technique: Mix cocoa butter with powdered colors or oil-based food coloring. Paint details while petals are set:
- Create color gradients from dark to light
- Add spots or stripes for authenticity
- Paint delicate veins with fine brush
- Layer colors for depth
Assembly: Attach painted petals using melted chocolate—two narrow at top, two wide on sides, ruffled lip at bottom. Add yellow center detail.
Best For: High-end weddings, luxury events, competition cakes.

Coloring and Decorating Chocolate Flowers
Color Options:
|
Type |
Best For |
Application Method |
|
Oil-based candy colors |
Vibrant hues |
Mix into melted chocolate |
|
Powdered colors |
Dusting, painting |
Brush onto finished flowers |
|
Cocoa butter colors |
Professional painting |
Mix with cocoa butter, paint on |
|
Luster dust |
Shimmer, metallic |
Dry brush or mix with alcohol |
Creating Realism: Add darker color at petal bases, lighter at edges for natural gradients. Paint delicate veins with fine brush. Add yellow or contrasting centers. Dust edges with luster dust for subtle shimmer.
Advanced Techniques: Use airbrush with cocoa butter colors for even, professional coverage. Layer multiple colors for depth. Add edible glitter for special occasions.
Assembly and Arrangement Techniques
Attaching to Cakes: Use small dots of melted chocolate, royal icing, or buttercream as "glue." Apply flowers to slightly soft frosting for better adhesion. For vertical placement, insert toothpick supports into flowers before positioning.
Creating Arrangements: Group flowers in odd numbers (3, 5, 7) for natural appearance. Vary sizes—large focal flowers with smaller filler blooms. Add chocolate leaves for greenery and contrast.
Cascading Designs: Start with largest flowers at top or side. Graduate to smaller flowers flowing down cake. This creates movement and elegance, especially beautiful on wedding cakes.
Positioning Tips: Place chocolate flowers at focal points—cake tops, tier junctions, or asymmetrically for modern appeal. Avoid overcrowding; negative space enhances sophistication.
Explore complementary chocolate decorations and cake pastry decorations to complete your design.
Storage and Shelf Life
Optimal Conditions: Store finished chocolate flowers in airtight containers at room temperature (60-65°F) away from sunlight and moisture. Layer between parchment paper to prevent sticking.
Longevity: Modeling chocolate flowers last 2-3 months when stored properly. Tempered chocolate flowers last 2-4 weeks. Make flowers days or weeks ahead to reduce event-day stress.
Preventing Issues: Avoid refrigeration unless absolutely necessary—temperature changes cause condensation and bloom. Never store near strong-smelling foods as chocolate absorbs odors.
Transport Tips: Pack flowers in rigid containers with crumpled paper towels filling empty spaces. Keep vehicles cool and handle gently to prevent breakage.
Common Mistakes and Solutions
|
Problem |
Cause |
Solution |
|
Flowers breaking/cracking |
Modeling chocolate too dry |
Knead with drop of corn syrup; start fresh if needed |
|
Colors bleeding |
Water-based coloring |
Use only oil-based or cocoa butter colors |
|
Petals won't hold shape |
Too warm/soft |
Refrigerate briefly; work in cooler environment |
|
Flowers melting on cake |
Too warm conditions |
Apply just before serving; use tempered chocolate |
|
Difficulty attaching |
Surface too cold/dry |
Apply to slightly soft frosting; use chocolate "glue" |
Temperature Control: Most problems stem from incorrect temperature. Work in 65-70°F environments and refrigerate modeling chocolate if it becomes too soft to handle.
Creative Ideas and Inspiration
Seasonal Designs:
- Spring: Pastel roses, cherry blossoms, tulips
- Summer: Vibrant sunflowers, tropical hibiscus, bold dahlias
- Fall: Deep red roses, burgundy dahlias, bronze-dusted flowers
- Winter: White roses, poinsettias, elegant orchids
Mixing Chocolate Types: Combine dark chocolate leaves with white chocolate flowers for striking contrast. Use milk chocolate for warm, romantic tones.
Modern vs. Traditional: Traditional styles feature realistic, botanical accuracy. Modern designs embrace abstract shapes, geometric arrangements, or minimalist single blooms.
Special Occasions: Wedding cakes showcase elegant white or ivory roses. Birthday cakes feature bright, playful blossoms. Anniversary cakes display romantic red roses or sophisticated orchids.
Professional Tips and Tricks
Essential Techniques:
- Work in consistently cool environments (65-70°F)
- Practice flower techniques before important cakes
- Make extra flowers—select only the best for final presentation
- Use reference photos of real flowers for realistic details
- Start with simple flowers before attempting complex varieties
Time-Saving: Batch-produce petals in various sizes. Create flower "kits" with pre-made components ready for quick assembly. Make flowers weeks ahead and store properly.
Consistency: Use templates or cutters for uniform petals. Measure modeling chocolate portions for identical flowers. This professional consistency elevates overall presentation.
Conclusion
Mastering how to make chocolate flowers transforms your cake decorating from ordinary to extraordinary, giving you skills to create edible botanical artwork that amazes guests. From beginner-friendly modeling chocolate roses to advanced painted orchids, these five techniques provide comprehensive capabilities for any skill level and occasion. Success depends on understanding modeling chocolate consistency, working in proper temperatures, and practicing techniques before important applications. Whether crafting romantic wedding cakes, celebratory birthday creations, or elegant dinner party centerpieces, chocolate flowers deliver breathtaking beauty combined with delicious flavor that inedible decorations cannot match. With proper storage, these stunning garnishes can be created weeks ahead, eliminating event-day stress while ensuring flawless results. Ready to create bakery-quality chocolate flowers? Explore premium chocolate, professional silicone molds, quality tools, and complete decorating supplies at Zucchero Canada to support your journey toward chocolate artistry that transforms every cake into an unforgettable masterpiece.
References
Callebaut. (2023). Chocolate flower and decoration techniques for professionals. Barry Callebaut Group.
Figoni, P. (2022). How baking works: Exploring the fundamentals of baking science (4th ed.). Wiley.
Greweling, P. (2023). Chocolates and confections: Formula, theory, and technique for the artisan confectioner (3rd ed.). Wiley.
Suas, M. (2022). Advanced bread and pastry: A professional approach (2nd ed.). Cengage Learning.


Leave a comment
All comments are moderated before being published.
This site is protected by hCaptcha and the hCaptcha Privacy Policy and Terms of Service apply.