


Chocolate garnishes transform ordinary cakes into extraordinary showpieces that captivate guests before the first bite. Learning how to make chocolate garnish for cake elevates your baking from homemade to bakery-quality, allowing you to create professional-looking desserts for special occasions, celebrations, or simply to impress family and friends. Homemade chocolate garnish techniques offer unmatched freshness, customization, and cost savings compared to store-bought alternatives that often lack the artisanal quality and creative flexibility you can achieve in your own kitchen. This comprehensive guide covers ten essential techniques—from simple chocolate curls for cake that beginners can master in minutes to advanced chocolate decorating methods that create stunning visual impact. Whether you're preparing a birthday celebration, wedding cake, or elegant dinner party dessert, these professional chocolate garnishes will elevate your presentation to new heights.
Essential Tools and Materials for Chocolate Garnishes
Before learning how to make chocolate garnish for cake, assembling the right tools and materials ensures smooth execution and professional results.
Choosing the Right Chocolate
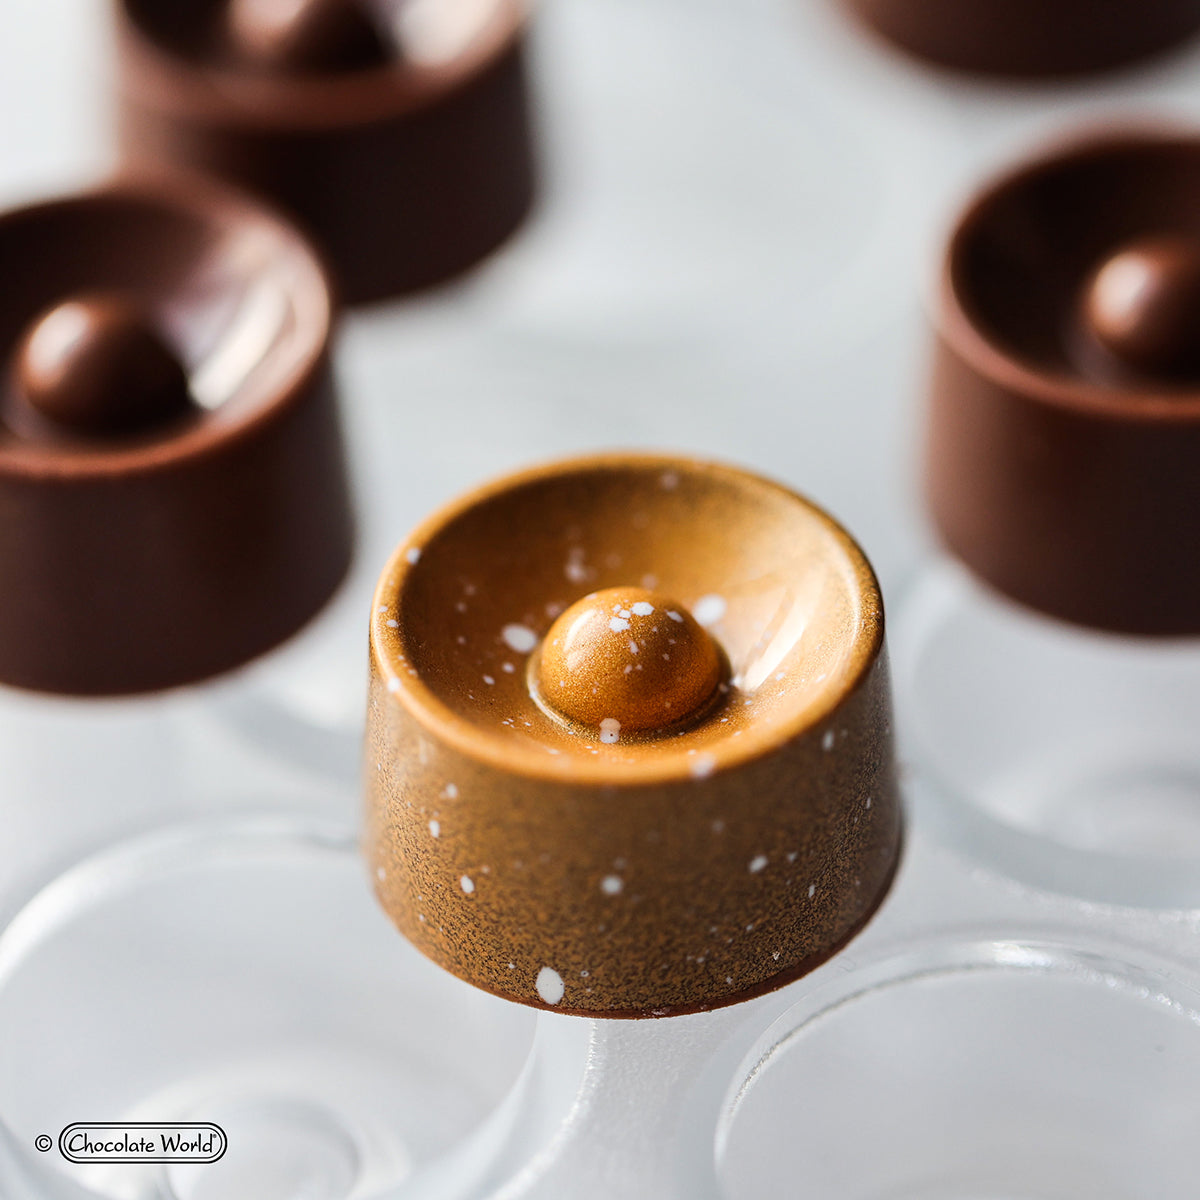
Quality chocolate is fundamental to creating beautiful chocolate cake decorations. Couverture chocolate, containing higher cocoa butter content (32-39%), provides superior workability, glossy finish, and proper snap for garnishes. Dark chocolate (60-70% cacao) offers stability and holds shape well in various temperatures. Milk chocolate creates softer, sweeter garnishes ideal for kid-friendly cakes. White chocolate, while technically not true chocolate, produces elegant, versatile decorations perfect for contrasting with darker elements.
Avoid standard chocolate chips containing stabilizers that prevent proper melting and setting. Look for chocolate bars, callets, or wafers labeled "couverture" or high-quality baking chocolate. For garnishes that don't require tempering, compound chocolate or candy melts work adequately, though they lack the depth and mouthfeel of real chocolate.
Must-Have Tools and Equipment
Having the proper tools makes making chocolate decorations significantly easier and more enjoyable. Different techniques require specific implements, though many tools serve multiple purposes.
|
Tool |
Primary Use |
Alternative Options |
|
Offset spatula (small & large) |
Spreading chocolate smoothly |
Butter knife for small areas |
|
Parchment paper or acetate sheets |
Non-stick surface for setting |
Silicone mats work well |
|
Vegetable peeler or chocolate scraper |
Creating curls and cigarettes |
Sharp knife in a pinch |
|
Digital thermometer |
Temperature monitoring |
Visual cues for experienced users |
|
Piping bags or squeeze bottles |
Detailed designs and patterns |
Ziplock bags with corner cut |
|
Microplane or box grater |
Fine shavings |
Standard grater works |
|
Bench scraper or ruler |
Creating straight edges for shards |
Any straight metal edge |
|
Various decorating combs and scrapers |
Textured effects |
Fork tines for simple patterns |
Additional specialized tools enhance your chocolate decorating repertoire but aren't essential for beginners. These include chocolate transfer sheets for patterned finishes, chocolate molds for shaped garnishes, and professional chocolate scrapers for creating perfect curls. As your skills develop, investing in quality tools pays dividends in efficiency and results.
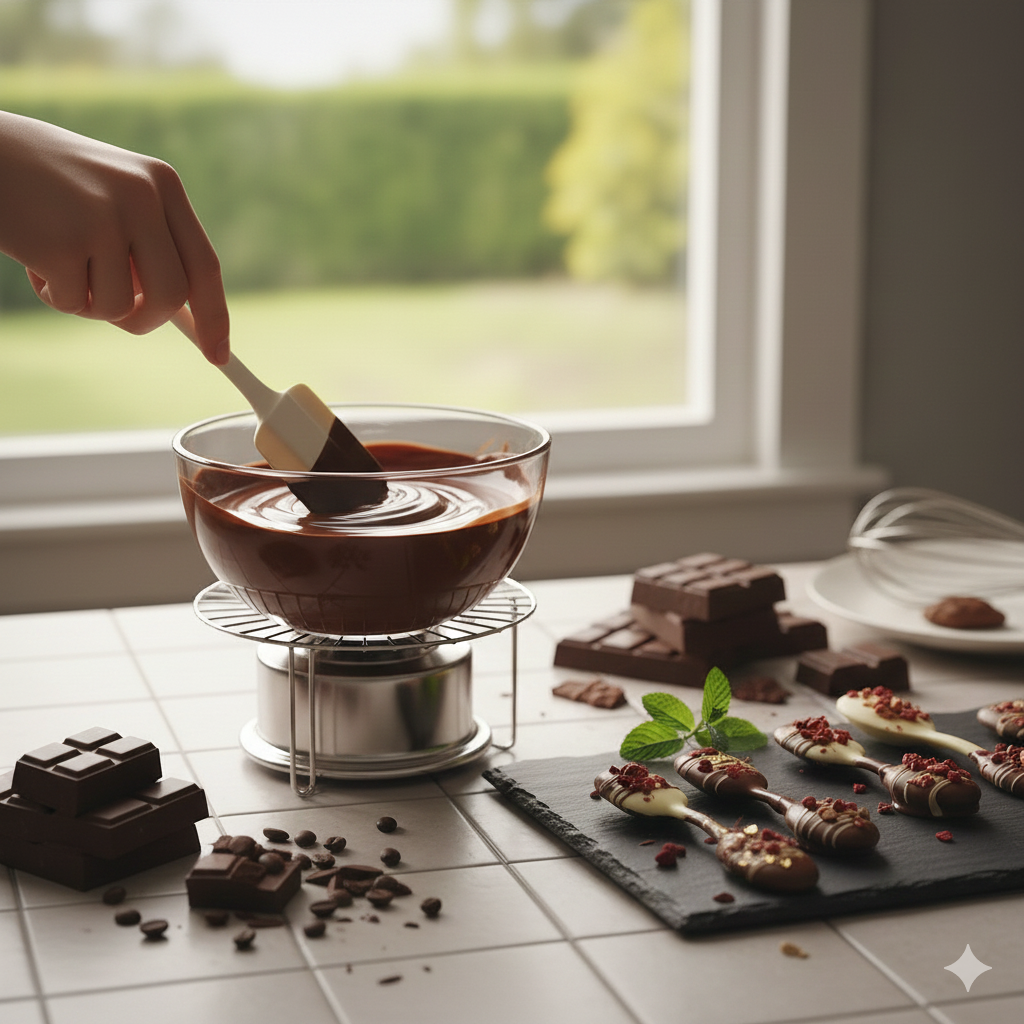
Preparing Your Chocolate for Garnishing
Proper chocolate preparation is crucial when learning how to make chocolate garnish for cake. The chocolate's temperature and consistency directly impact the success of every technique.
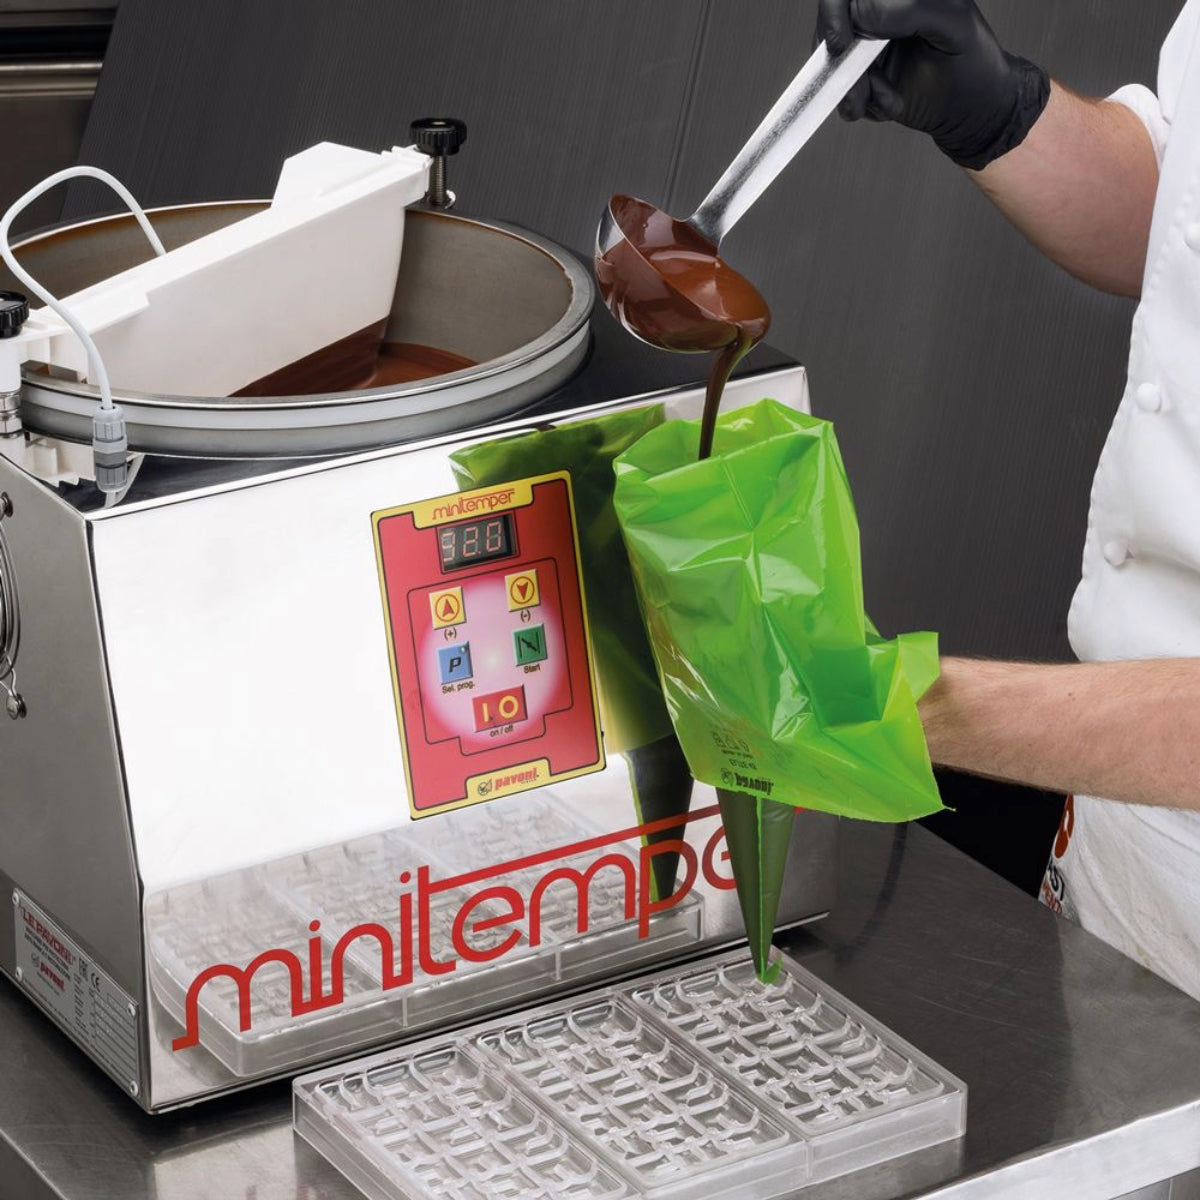
Melting Methods: Use the microwave method by heating chocolate in 30-second intervals at 50% power, stirring between each burst until 80% melted, then stirring to complete melting with residual heat. The double boiler method offers superior control—simmer one inch of water in a saucepan, place a bowl on top (not touching water), and stir chocolate constantly until smooth.
Tempering Considerations: While chocolate garnish techniques don't always require tempering, properly tempered chocolate produces garnishes with glossy appearance, satisfying snap, and resistance to melting at room temperature. For simple garnishes used immediately and stored in cool conditions, you can skip tempering. For garnishes made in advance or displayed at room temperature, tempering prevents bloom and ensures longevity.
Working Temperature: Most garnish techniques work best when chocolate reaches specific temperatures. For spreading techniques like shards and cigarettes, chocolate should be slightly warm (85-90°F) but not hot. For piping and detailed work, cooler chocolate (80-85°F) provides better control. Keep chocolate at working temperature by placing the bowl over warm (not hot) water occasionally, or use short 5-second microwave bursts with constant stirring.
10 Stunning Chocolate Garnish Techniques
Mastering these ten professional methods for how to make chocolate garnish for cake provides unlimited creative possibilities for any celebration or occasion.
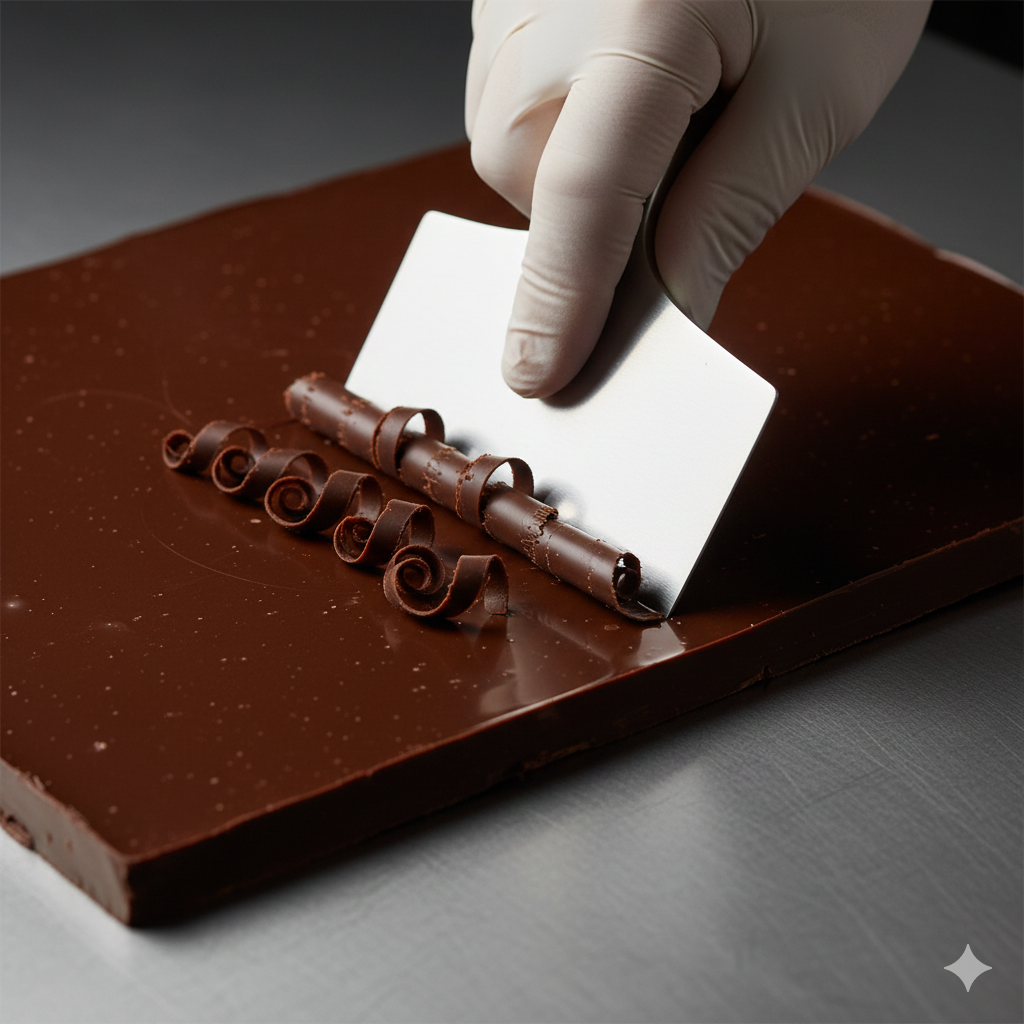
1. Classic Chocolate Curls
Chocolate curls for cake rank among the most popular and impressive garnishes, offering elegant sophistication with minimal effort. This technique requires chocolate at precisely the right temperature—too cold and it splinters, too warm and it won't hold shape.
Start with a thick chocolate bar or block at room temperature (never refrigerated). Using a vegetable peeler or specialized chocolate scraper, draw the tool firmly along the flat side of the chocolate in one smooth motion. The chocolate should curl naturally as it comes off the block. For tighter curls, use slightly warmer chocolate and apply more pressure. For looser, more dramatic curls, work with cooler chocolate and lighter pressure.
If your chocolate is too cold, warm it briefly with your hands or place it near (not on) a warm surface for 1-2 minutes. Handle finished curls minimally, using a toothpick or small offset spatula to transfer them—body heat from fingers causes melting. Store chocolate curls for cake in a cool place between parchment paper layers until ready to arrange on your cake.

2. Chocolate Shavings
Fine chocolate shavings create delicate, snow-like coverage perfect for rustic cakes or adding texture to smooth frosting. This chocolate garnish technique works best with chocolate slightly cooler than room temperature.
Use a microplane, box grater, or vegetable peeler held at a shallow angle against a chocolate block. Work over parchment paper to catch shavings easily. For ultra-fine shavings resembling powder, use a microplane. For larger, more substantial pieces, use the large holes of a box grater. The chocolate block should be cool but not cold—refrigerate for just 5-10 minutes if working in a warm environment.
Create visual interest by mixing dark and white chocolate shavings, or dust shavings with edible luster dust for shimmer. Apply shavings by gently pressing them onto freshly frosted cakes or sprinkling from above for random coverage. This technique works beautifully for covering cake sides or creating borders along the base.
3. Chocolate Shards (Bark)
Dramatic chocolate shards add modern, architectural elegance when learning how to make chocolate garnish for cake. These striking vertical elements create impressive height and visual drama on any cake design.
Melt chocolate and pour onto a parchment-lined baking sheet, spreading to 1/8-inch thickness with an offset spatula. For smooth, glossy shards, spread chocolate evenly and let set undisturbed. For textured effects, drag decorating combs through the chocolate in wavy or straight patterns before setting.
Enhance visual appeal by drizzling contrasting chocolate colors, sprinkling with chopped nuts or cocoa nibs, or dusting with edible gold before the chocolate sets. Allow chocolate to set at room temperature until it loses shine but hasn't fully hardened (approximately 10-15 minutes). Using a sharp knife or bench scraper, score the chocolate into irregular shard shapes—triangles, long rectangles, or abstract pieces work beautifully.
Let chocolate set completely (another 15-20 minutes), then break along scored lines. Insert shards vertically into cake frosting at varying heights and angles for dynamic presentation. The irregular shapes create organic, artistic appeal that looks professionally crafted.
4. Piped Chocolate Decorations
Piped chocolate cake decorations offer unlimited creativity, from simple dots and swirls to intricate lettering and elaborate designs. This versatile technique works on parchment paper for transfer or directly on cakes.
Fill a piping bag or squeeze bottle with melted chocolate cooled to approximately 85°F—warm enough to flow smoothly but cool enough to hold shapes. Practice pressure control on parchment paper before attempting final designs. Create classic decorations like chocolate dots, swirls, zigzags, hearts, or even write names and messages.
For transfer decorations, pipe designs onto parchment paper and refrigerate until fully set (10-15 minutes). Carefully peel parchment away and position chocolate pieces on your cake. This method allows making decorations in advance and ensures precise placement. For intricate designs, draw patterns on paper, place parchment over the template, and pipe following the lines underneath.
Advanced pipers create three-dimensional decorations by piping thicker bases and building layers. Chocolate filigree patterns, geometric designs, and delicate lace effects all stem from mastering piping techniques. The beauty of piped chocolate decorating lies in its accessibility—even beginners can create attractive designs with practice.

5. Chocolate Cigarettes (Scrolls)
Elegant chocolate cigarettes add sophisticated, professional flair to any cake. These tightly rolled cylinders require practice but create stunning visual impact worth the effort when learning how to make chocolate garnish for cake.
Spread melted chocolate thinly (about 1/16-inch) on a marble slab, granite countertop, or back of a clean baking sheet using an offset spatula. Allow chocolate to set until it loses its shine but still feels slightly tacky (approximately 5-7 minutes). The timing is critical—too soft and it smears, too hard and it cracks.
Hold a long metal spatula or bench scraper at a 45-degree angle and push firmly across the chocolate surface. The chocolate should naturally curl upward and roll into a tight cylinder. For looser scrolls, use a shallower angle and less pressure. If chocolate shatters, it's too cold—let it warm slightly. If it smears without rolling, it's too warm—wait longer.
Work quickly once chocolate reaches the right consistency, as the window for success is brief. Create various sizes by adjusting scraper width and chocolate thickness. Arrange chocolate cigarettes vertically around cake edges or lay them horizontally across the top for classic French pastry presentation.
6. Chocolate Leaves
Natural chocolate leaves bring organic elegance to cakes, perfect for garden-themed celebrations, rustic designs, or autumn cakes. This technique transforms real leaves into edible chocolate garnishes with realistic vein details.
Select non-toxic leaves with prominent veins—rose, lemon, or bay leaves work beautifully. Wash and dry leaves completely (moisture causes chocolate to seize). Using a small paintbrush or offset spatula, paint melted chocolate onto the back (vein side) of leaves in a layer about 1/8-inch thick. Avoid painting over edges, which makes removal difficult.
Place chocolate-coated leaves on parchment paper, chocolate side up, and refrigerate until completely set (15-20 minutes). Once firm, carefully peel the real leaf away from the chocolate, starting at the stem end. The chocolate retains every natural detail, creating remarkably realistic leaves.
Create variety using dark, milk, and white chocolate. For autumn themes, dust leaves with food color spray in bronze, gold, or copper before chocolate fully sets. Arrange chocolate leaves cascading down cake sides or clustered on top with edible flowers for breathtaking natural presentations.
7. Chocolate Fans
Graceful chocolate fans add movement and elegance, particularly beautiful on wedding cakes or formal celebrations. This intermediate technique creates delicate, layered effects that showcase your chocolate decorating skills.
Spread tempered chocolate thinly on parchment paper or acetate in a rectangle approximately 4x6 inches. Allow to set until tacky but pliable. Using a sharp knife, cut the rectangle into strips about 1 inch wide. While still flexible, gather one end of each strip and pinch together, allowing the other end to fan outward naturally.
For more dramatic fans, create pleated effects by folding strips accordion-style before setting completely. Support fans with toothpicks or small pieces of foam until chocolate hardens fully. The result resembles elegant fabric fans that add sophisticated dimension to any cake.
Create color variations by layering different chocolate types or marbling colors together before cutting. Position fans radiating from cake centers or arrange around cake bases for dramatic effect. These stunning chocolate cake decorations never fail to impress guests with their delicate beauty and apparent complexity.
8. Modeling Chocolate Flowers
Modeling chocolate allows sculpting intricate flowers and decorative elements that rival fondant's versatility while tasting infinitely better. This technique requires making modeling chocolate—a pliable mixture of chocolate and corn syrup that handles like clay.
To make modeling chocolate, heat 1/3 cup light corn syrup until warm (not hot), then pour over 2 cups chopped chocolate (dark, milk, or white). Stir until smooth, then wrap in plastic and let rest at room temperature for 2-4 hours until it firms to a clay-like consistency. If too soft, refrigerate briefly. If too stiff, microwave for 5-10 seconds.
Knead modeling chocolate until pliable, then pinch off small pieces to shape petals. For roses, create a small cone for the center, then wrap thin petals around it, building outward and curling edges slightly for realistic appearance. For simple flowers, flatten small balls and pinch one end to form teardrop petals, then arrange around a center.
Using 3D seasonal chocolate molds or polycarbonate chocolate molds speeds the process and ensures consistent, professional-looking flowers. Model leaves by flattening small pieces and scoring vein patterns with a knife. These dimensional chocolate garnishes can be made days in advance and stored at room temperature in airtight containers.

9. Chocolate Lace and Filigree
Delicate chocolate lace creates ethereal, romantic chocolate cake decorations perfect for weddings, anniversaries, or any celebration deserving extra elegance. This advanced technique requires steady hands but produces breathtaking results.
Fill a piping bag fitted with a tiny round tip (or use a squeeze bottle with a small opening) with chocolate cooled to approximately 80-85°F. On parchment paper, pipe continuous swirling patterns without lifting the tip—create loops, swirls, and figure-eights that connect into cohesive lace designs. For consistency, place a printed lace pattern under parchment paper and trace over it.
Work quickly as chocolate sets fast in thin lines. Create multiple pieces as backups since lace is fragile. Refrigerate until completely set (10-15 minutes), then carefully peel parchment away. Handle lace with extreme care, using an offset spatula for support. Position pieces on cakes while frosting is still slightly soft for better adhesion.
For three-dimensional effects, pipe lace over curved surfaces like rolling pins or bottles, allowing chocolate to set in curved shapes. These architectural elements add dramatic height and interest. Combine lace with other chocolate garnish techniques like leaves or flowers for layered, complex designs that showcase your skills.
10. Chocolate Geometric Shapes
Modern, clean-lined geometric shapes create contemporary sophistication perfect for minimalist cake designs or trendy celebrations. This technique suits beginners while offering professional-quality results when learning how to make chocolate garnish for cake.
Spread tempered chocolate evenly on parchment paper to 1/8-inch thickness. Allow to set until it loses shine but hasn't fully hardened. Using cookie cutters, rulers, or templates, cut precise shapes—triangles, hexagons, circles, or squares. Let chocolate harden completely before removing from parchment.
Create visual interest through contrasting colors by using dark, milk, and white chocolate shapes together. Layer shapes at different angles on cake tops or arrange around cake sides in repeating patterns. For metallic modern looks, dust shapes with edible gold luster or spray with spray colors in metallics.
Advanced variations include creating geometric "sails" that stand vertically on cakes, supported by inserting one edge into firm frosting or modeling chocolate bases. Stack geometric shapes in artistic arrangements, adhering layers with small dots of melted chocolate. These contemporary chocolate garnishes align with current design trends while remaining timeless in their clean elegance.
Color and Texture Variations
Enhancing chocolate cake decorations with color and texture variations elevates presentations from beautiful to absolutely stunning. Understanding how to combine different chocolate types and additives creates unlimited creative possibilities.
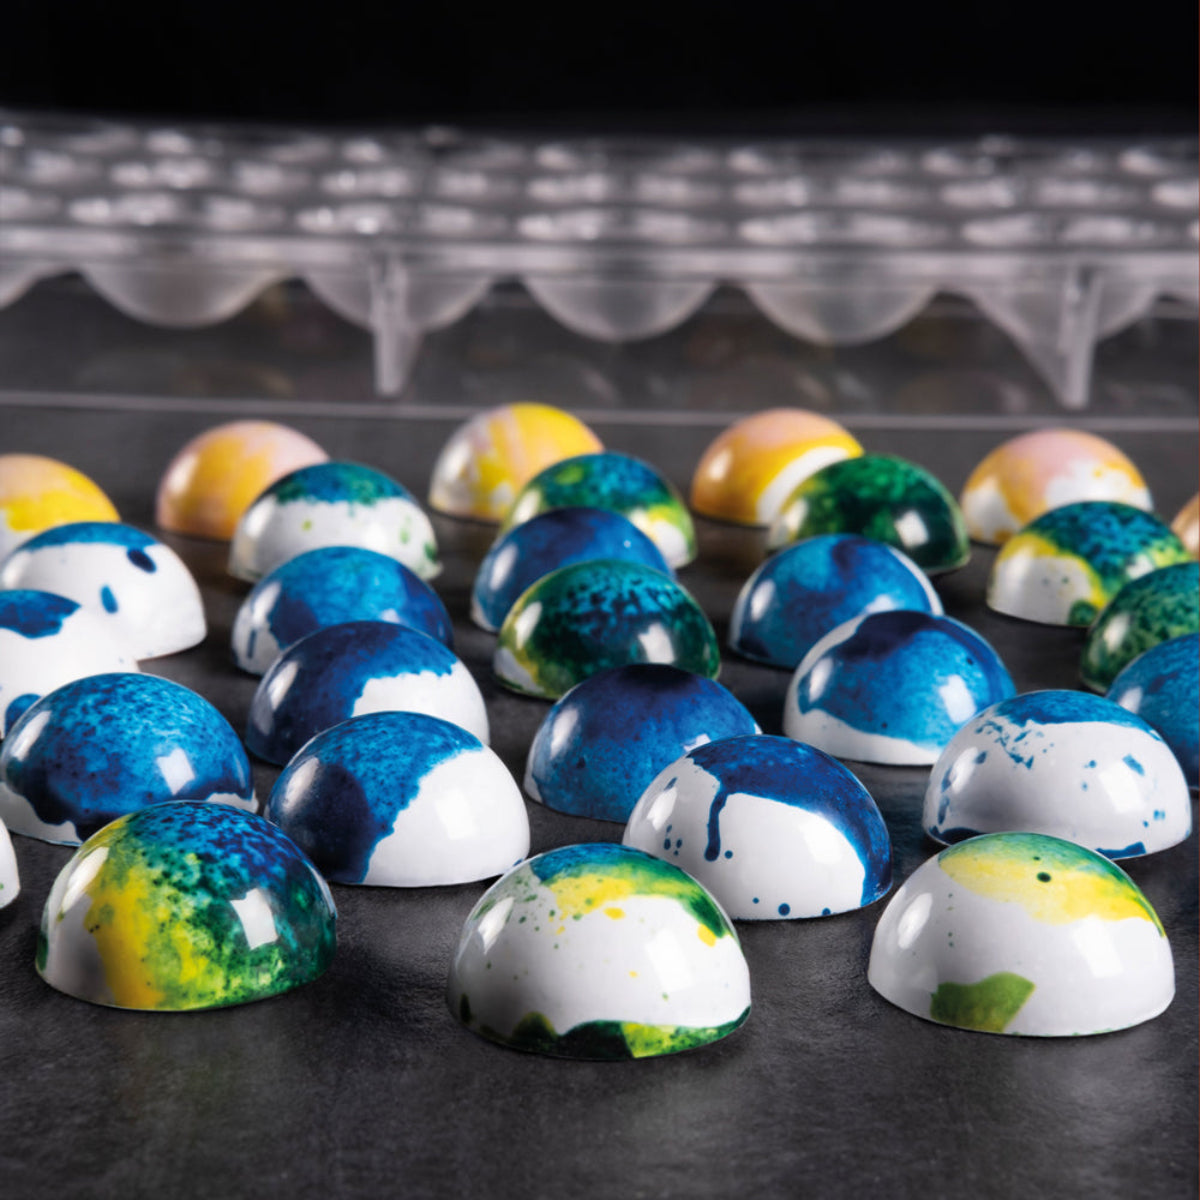
Color Combinations: Layer white, milk, and dark chocolate for natural contrast that requires no additional coloring. Create marbled effects by pouring two chocolate colors onto parchment simultaneously, then swirling gently with a toothpick before spreading and setting. For vibrant colors, tint white chocolate with oil-based candy colors or colors for chocolate—never use water-based food coloring, which causes chocolate to seize.
Professional Finishing Touches: Edible gold leaf, powdered colors, luster dust, and spray colors transform chocolate garnishes into luxury decorations. Apply luster dust with dry brushes for subtle shimmer or mix with clear alcohol for painted metallic effects. Spray colors create even, professional coverage impossible to achieve by hand—gold, silver, and pearl finishes particularly enhance chocolate's natural elegance.
Texture Additions: Before chocolate sets completely, press in textural elements for visual and flavor interest:
- Finely chopped pistachios, almonds, or hazelnuts for elegant crunch
- Cocoa nibs for intense chocolate flavor and rustic appeal
- Freeze-dried fruit powder for color and subtle flavor
- Sea salt flakes for sophisticated sweet-savory contrast
- Crushed cookies or candy for whimsical designs
- Edible flowers for romantic, garden-themed presentations
Explore quality supplies and professional equipment at Zucchero Canada to expand your chocolate decorating capabilities with premium tools and ingredients that make artistic techniques more accessible.
Storage and Handling Tips
Properly storing chocolate garnishes ensures they remain pristine until cake assembly, preventing the frustration of recreating damaged decorations at the last minute.
Optimal Storage Conditions: Store finished chocolate cake decorations in airtight containers between layers of parchment paper in cool, dry locations (60-65°F). Avoid refrigeration unless absolutely necessary, as temperature fluctuations cause condensation that creates bloom—those unattractive white streaks or spots on chocolate surfaces. If you must refrigerate, seal containers completely and allow garnishes to come to room temperature before opening to prevent condensation.
Longevity Guidelines: Properly stored chocolate garnishes maintain quality for impressive durations—tempered chocolate decorations last 2-3 months, while untempered pieces should be used within 2 weeks. Modeling chocolate flowers and shapes stored in airtight containers at room temperature remain pliable and usable for several months.
Handling Delicate Pieces: Always handle chocolate garnishes with clean, dry hands or tools—moisture and warmth cause melting and fingerprints. Use offset spatulas or toothpicks for transferring delicate pieces like lace or curls. Work quickly in cool environments, returning finished pieces to storage immediately.
Timing Cake Assembly: Add most chocolate garnishes to cakes shortly before serving to prevent melting or damage. Buttercream-frosted cakes accept decorations easily and hold them securely. For fondant-covered cakes, attach garnishes with small dots of royal icing or melted chocolate as "glue." Reserve the most delicate garnishes (lace, fine curls) for final moments before presentation to ensure pristine appearance.
Common Mistakes and Solutions
Understanding common pitfalls when learning how to make chocolate garnish for cake prevents frustration and wasted materials. Most problems trace back to temperature issues or rushing the process.
|
Problem |
Cause |
Solution |
Prevention |
|
Garnishes break easily |
Chocolate too cold; worked too quickly |
Warm chocolate slightly; work more patiently |
Allow chocolate to reach proper temperature |
|
Won't hold shape |
Chocolate too warm; under-set |
Cool chocolate more; refrigerate longer |
Test temperature before working |
|
Dull, streaky appearance |
Improper tempering; condensation |
Re-temper for next batch; avoid refrigeration |
Practice tempering technique; control humidity |
|
Melts on cake |
Room too warm; added too early |
Work in cooler environment; add just before serving |
Control ambient temperature; time assembly |
|
Chocolate seizes (grainy) |
Water contact; overheating |
Start fresh batch; can't rescue seized chocolate |
Keep all tools dry; heat gently |
|
Uneven thickness |
Inconsistent spreading; rushed work |
Use guides for uniform spreading; work patiently |
Practice spreading techniques |
Temperature Troubleshooting: The most frequent issue in making chocolate decorations involves incorrect working temperature. If chocolate flows too easily, it's too warm—wait longer or refrigerate briefly. If it shatters or cracks, it's too cold—warm slightly with hands or near warm surface. The ideal working temperature feels barely warm to touch and spreads smoothly without being runny.
Environment Control: Work in air-conditioned spaces during warm weather. High humidity affects chocolate's ability to set properly and can cause bloom. If your kitchen runs warm, consider working early morning or evening during cooler hours. Professional chocolatiers often maintain dedicated climate-controlled spaces for chocolate decorating, though home bakers can achieve excellent results with strategic timing and environment management.
Pro Tips for Bakery-Quality Results
Elevating your chocolate garnish techniques from good to exceptional requires attention to professional details that separate amateur from bakery-quality work.
Practice Makes Perfect: Before creating garnishes for important cakes, practice each technique multiple times. Chocolate is forgiving—failed attempts can be re-melted and tried again. Create sample garnishes days ahead to refine techniques and build confidence. Keep a "practice journal" noting what temperatures and timings worked best for your specific environment and chocolate brands.
Advanced Planning: Make chocolate garnishes 1-3 days ahead of cake assembly when possible. This reduces last-minute stress and allows focusing on cake baking and frosting without rushing decoration. Store finished pieces properly and do a final quality check before assembly, discarding any damaged pieces.
Design Cohesion: Match garnish style to overall cake design for cohesive presentation. Rustic cakes pair beautifully with chocolate shards and rough-chopped pieces. Elegant, formal cakes demand refined curls, cigarettes, or delicate lace. Modern, minimalist designs shine with clean geometric shapes and negative space. Consider color schemes, cake flavors, and event themes when selecting which chocolate cake decorations to create.
Quality Ingredients Matter: Invest in quality chocolate from reputable brands or specialty suppliers. Premium chocolate not only tastes better but also works more reliably, producing consistent results with superior appearance. Visit Zucchero Canada for professional-grade fine chocolate, specialized pastry baking tools, and chocolate molds that elevate your chocolate decorating to professional standards.
Balance Beauty with Practicality: While elaborate chocolate garnishes impress visually, consider practicality for your specific situation. Tall, delicate decorations may not survive transport to event venues. Extremely intricate designs might overwhelm simple cake flavors. The best garnishes enhance rather than overpower, complementing the cake's overall presentation while remaining structurally sound enough for their intended purpose.
Temperature Testing: Before committing to final garnishes, test your chocolate's behavior at the temperature where the cake will be displayed. If serving outdoors in warm weather, ensure garnishes are properly tempered or consider sturdier options that withstand heat better. For refrigerated display, choose garnishes that tolerate temperature changes without developing bloom.
Conclusion
Mastering how to make chocolate garnish for cake transforms your baking presentations from homemade to professionally stunning, giving you the skills to create breathtaking desserts for any occasion. From simple chocolate curls for cake that beginners can perfect in minutes to advanced chocolate decorating techniques like delicate lace and sculptural flowers, these ten methods provide unlimited creative possibilities for personalizing celebrations. The key to success lies in understanding chocolate's temperature-sensitive nature, practicing techniques before important events, and selecting garnishes that complement your overall cake design aesthetically and structurally. Whether crafting elegant wedding cakes, whimsical birthday celebrations, or sophisticated dinner party desserts, these professional chocolate garnish techniques ensure your creations receive the admiration they deserve. With patience, quality ingredients, and proper tools, you'll consistently produce chocolate cake decorations that rival those from high-end bakeries. Ready to elevate your cake decorating to professional levels? Explore premium chocolate-working supplies, specialized chocolate decorations, professional cake and pastry decorations, quality chocolate, and expert tools at Zucchero Canada to unlock your creative potential and create stunning chocolate garnishes that transform every cake into an unforgettable centerpiece that amazes guests before the first delicious bite.
References
Callebaut. (2023). Advanced chocolate decoration techniques for professional pastry chefs. Barry Callebaut Group.
Figoni, P. (2022). How baking works: Exploring the fundamentals of baking science (4th ed.). Wiley.
Greweling, P. (2023). Chocolates and confections: Formula, theory, and technique for the artisan confectioner (3rd ed.). Wiley.
Suas, M. (2022). Advanced bread and pastry: A professional approach (2nd ed.). Cengage Learning.


Leave a comment
All comments are moderated before being published.
This site is protected by hCaptcha and the hCaptcha Privacy Policy and Terms of Service apply.