


Molding chocolate is one of the foundational skills in professional chocolate production. Done correctly, polycarbonate molds produce bonbons and bars with a mirror-like gloss, clean snap, and effortless release. Done incorrectly, you get bloom, sticking, streaks, and wasted couverture. This guide covers professional technique for both polycarbonate and silicone molds — from mold preparation through filling, cooling, and unmolding.
Polycarbonate vs silicone molds: which for which application
| Property | Polycarbonate | Silicone |
| Best for | Bonbons, pralines, bars, tablets, hollow figures | Entremets, mousses, ganache inserts, pastry |
| Finish | High gloss (mirrors the mold surface) | Matte to semi-gloss |
| Release mechanism | Contraction of tempered cocoa butter | Flexible mold peels away |
| Requires tempering? | Yes — critical for release and gloss | No — works with untempered preparations |
| Temperature range | Chocolate only (up to ~35°C working) | -40°C to +250°C — oven, freezer, fridge |
| Coloring technique | Cocoa butter colors applied to cavity before filling | Color applied to surface after demolding |
| Cleaning | Wipe clean, do not wash with soap | Dishwasher safe |
Step-by-step: molding with polycarbonate molds
1. Prepare and polish the mold
A polycarbonate mold must be impeccably clean and dry before use. Any water residue, fingerprint oil, or detergent film will transfer directly to the chocolate surface and ruin the gloss.
- Wipe each cavity with a clean, dry cotton cloth or cotton ball — polish in circular motions until the surface is completely clear
- Never wash polycarbonate molds with soap or put them in a dishwasher — detergent residue is almost impossible to remove completely and will permanently dull the surface
- Pre-warm molds to 26–28°C before filling. Cold molds cause the chocolate to set too quickly at the surface, creating streaks and uneven crystallization
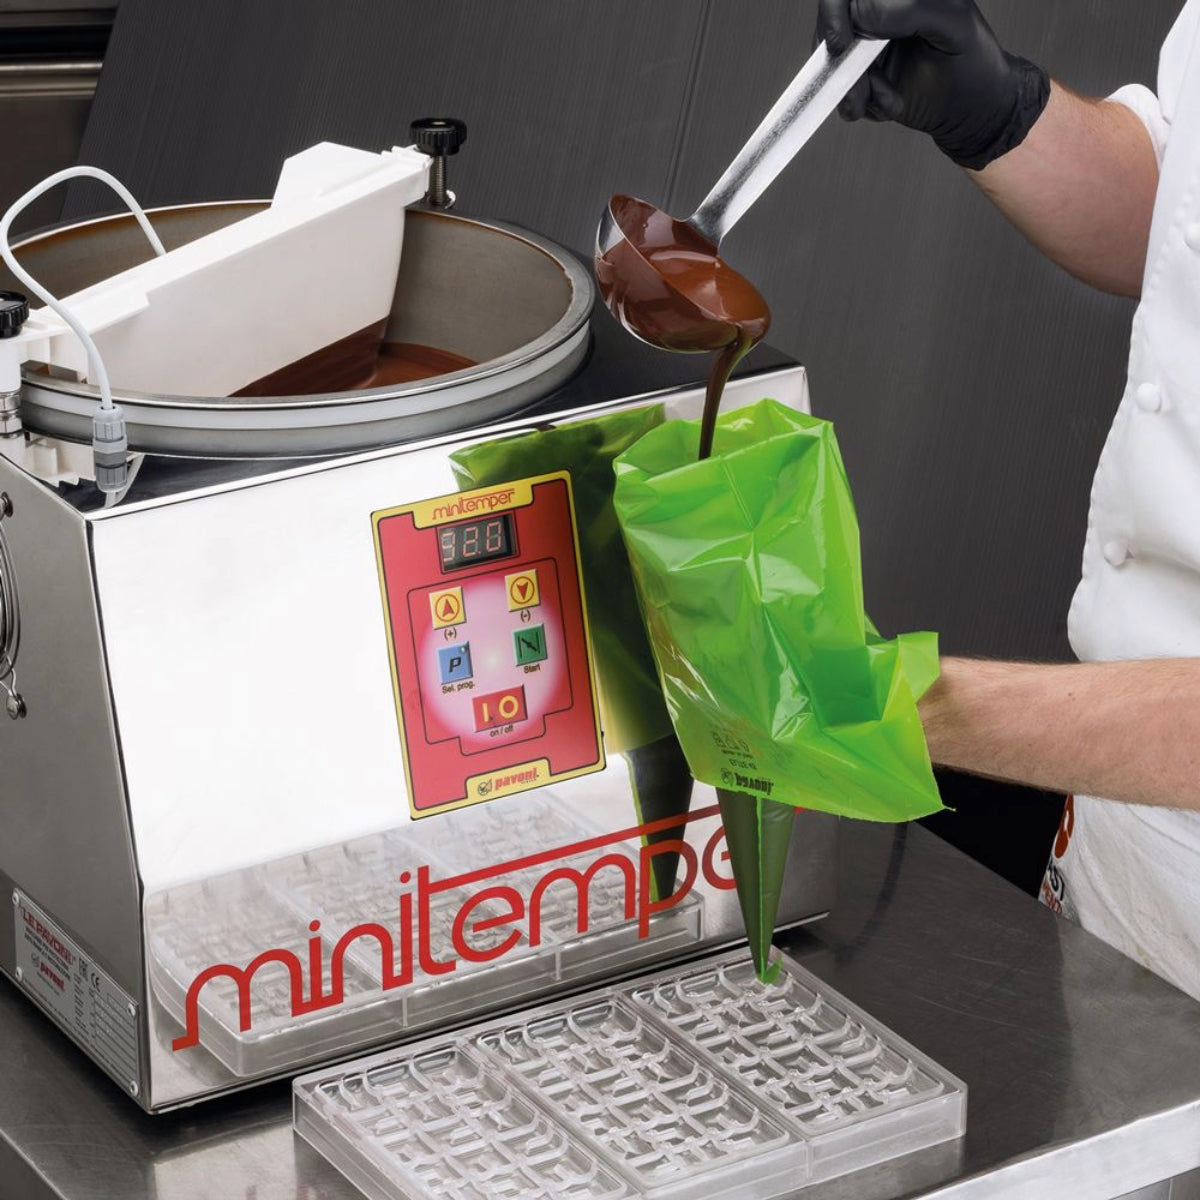
2. Temper your chocolate
Polycarbonate molds require properly tempered couverture. Tempered chocolate contracts slightly as it cools — this contraction is what releases the chocolate from the mold. Under-tempered chocolate does not contract and will stick. See our tempering machine guide for equipment recommendations by production volume.
Working temperatures by type:
- Dark couverture: 31–32°C
- Milk couverture: 29–30°C
- White couverture: 28–29°C
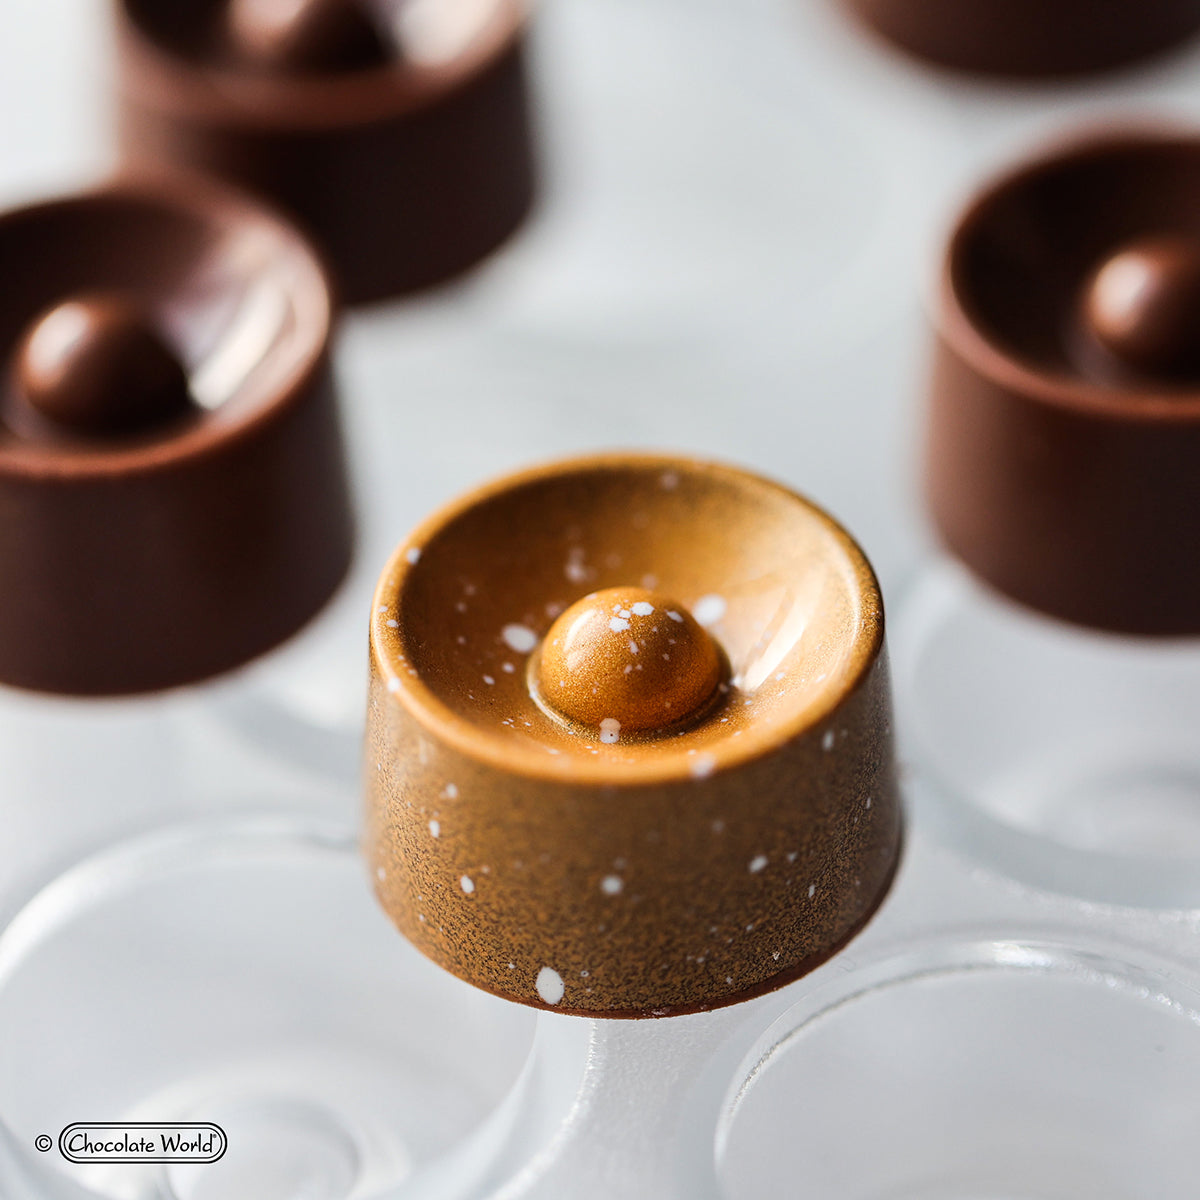
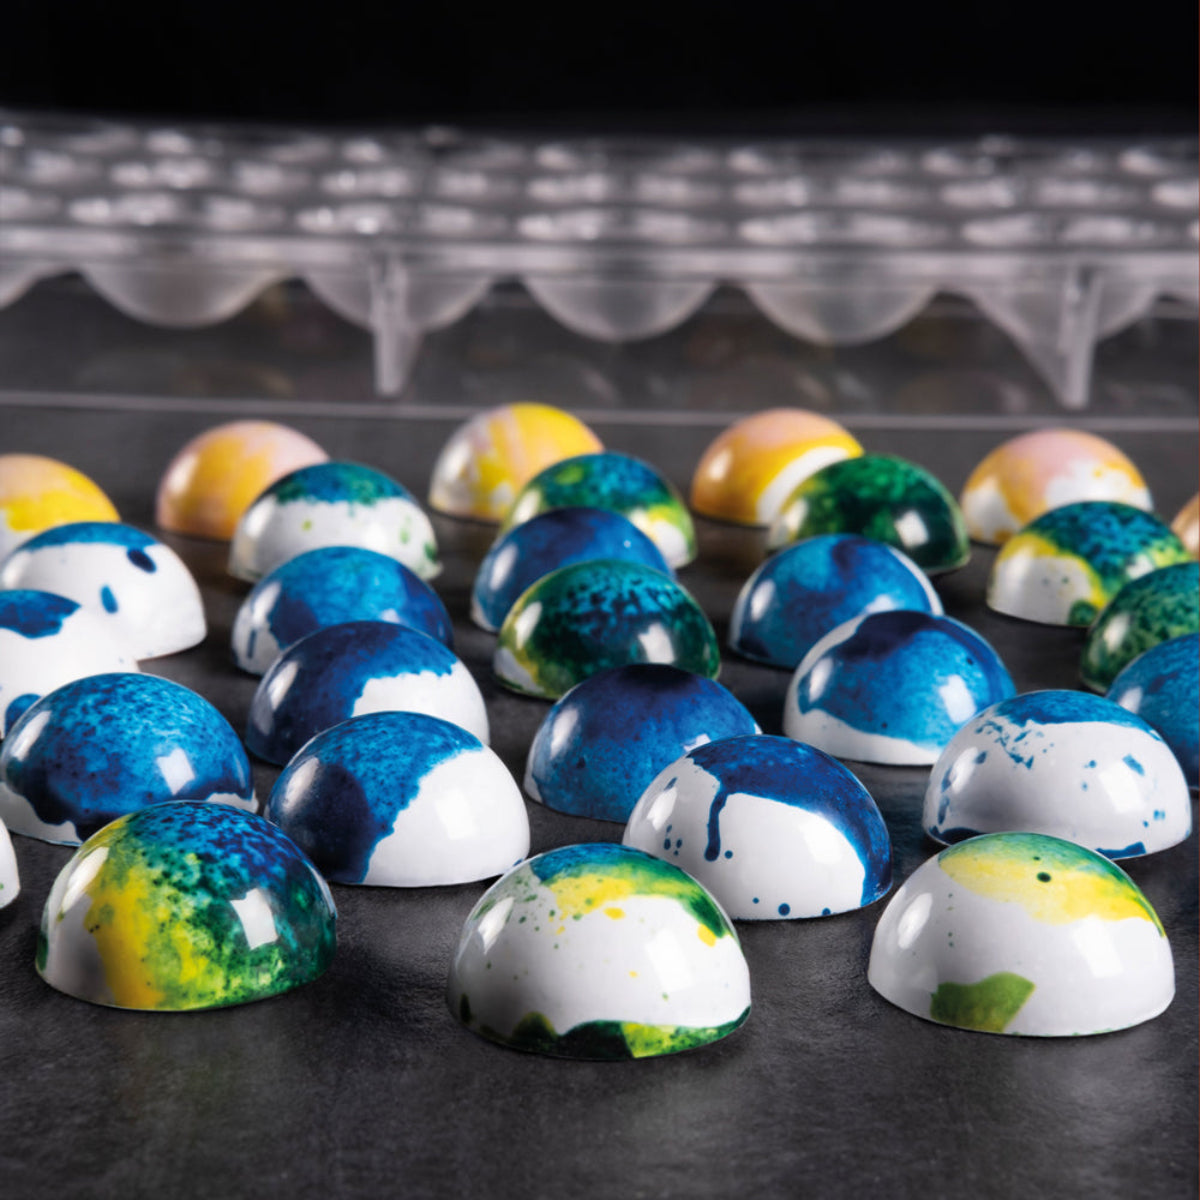
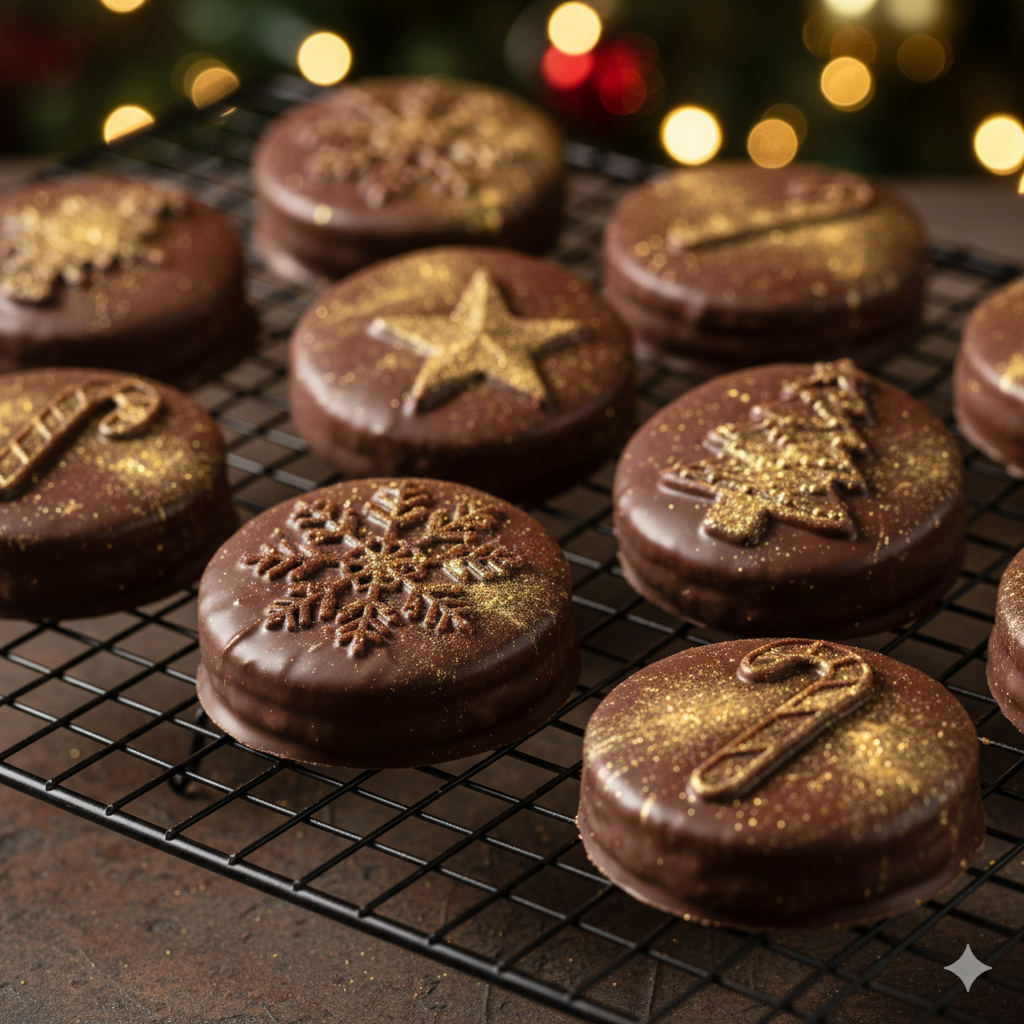
3. Apply cocoa butter colors (optional)
For colored bonbons, cocoa butter color is applied to the mold cavity before filling. The color bonds to the chocolate shell as it sets, creating the mirror-finish effect that defines professional bonbon work.
Two application methods:
- Brush application: Apply melted cocoa butter color (30–32°C) directly to the cavity with a small brush. Work in thin layers, allow each layer to set before the next. Best for detailed designs and gradients.
- Spray application: Use an airbrush or velvet spray for even coverage across multiple cavities. Faster for production volume.
Pavoni Italia's Chocolart line offers 14 ready-to-use cocoa butter colors (liquid, 200g, $79.99–$109 CAD) — pre-tempered, professionally formulated, E171-free. For vegan and clean-label production, the Seasons line offers the same range in plant-based, natural pigments ($69–$83 CAD).
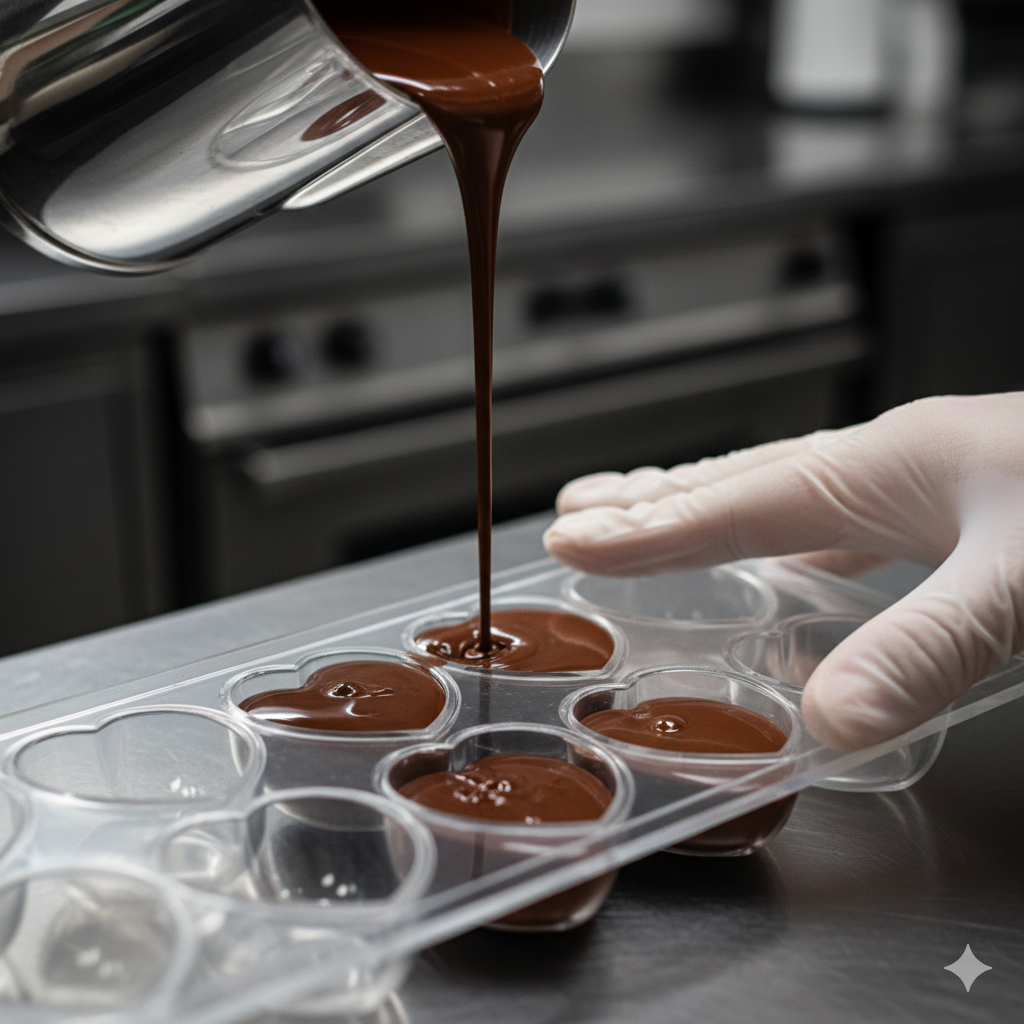
4. Fill the mold — first shell
Pour tempered chocolate into all cavities, filling to the rim. Tap the mold firmly against the work surface several times to release air bubbles. Vibrating the mold on a vibrating table gives the best results for bubble-free shells.
Invert the mold over your bowl and tap to drain the excess chocolate, leaving a thin shell. Scrape the top of the mold clean with a bench scraper — a straight, clean edge is important for a flat base on the finished bonbon. Let the shell set briefly (2–3 minutes) before proceeding.
5. Add filling
Fill the shells with your ganache, praline, caramel, or other filling, leaving 2–3 mm clearance from the top of the cavity. Do not overfill — the closing layer of chocolate needs space to seal completely.
Allow filling to firm slightly if it is a soft ganache, to prevent it mixing with the closing chocolate.
6. Close the mold
Pour tempered chocolate over the entire mold to close the cavities. Scrape clean with a bench scraper, ensuring a perfectly flat surface with no gaps or holes. Any opening will cause the filling to leak during cooling.
7. Cool and unmold
Cool at 12–15°C with gentle airflow for 15–20 minutes. A dedicated cooling cabinet or cooling tunnel provides the most consistent results — a standard refrigerator cycles between 4–8°C and creates condensation risk when pieces are moved to room temperature.
The mold is ready to unmold when the back surface shows a slight condensation forming and then clearing — the chocolate is contracting away from the mold walls at this point. Flex the mold gently and invert onto a clean surface. Properly tempered chocolate in a polished mold releases with minimal effort.
Polycarbonate mold care — making molds last
- Clean immediately after use: Wipe out residual chocolate while still soft with a dry cloth. For stubborn residue, warm the mold briefly to soften the chocolate before wiping.
- Never use soap or dishwasher: Detergent residue permanently dulls the polycarbonate surface and transfers to every batch after.
- Store flat: Keep away from direct sunlight, sharp objects, and stacking weight. Scratches transfer to the chocolate surface.
- Polish before each use: Even clean molds benefit from a final polish with a dry cotton cloth before filling.
Silicone molds: different technique
Silicone molds (Pavoflex, Formaflex, Chocoflex) are used for pastry applications — entremets, frozen mousses, ganache inserts, petit fours. They do not require tempering. Fill with your preparation, freeze or refrigerate, then peel the silicone away from the set product.
For chocolate inserts and decorations in silicone: fill with tempered couverture, cool at 12–15°C, then peel. The silicone release is mechanical, not dependent on cocoa butter contraction — so temper is beneficial for snap and gloss but not required for release.
Browse our silicone mold collection: 3D silicone molds, entremet molds, petit four molds.
Our mold collections
We carry professional molds from three European manufacturers — stocked in Calgary, shipping across Canada:
- Chocolate World bonbon and praline molds — Belgian polycarbonate, the professional standard for bonbon production
- Bar and tablet molds — Chocolate World, Pavoni Italia, Martellato
- 3D figure molds — eggs, animals, seasonal, showpieces
- Easter molds — eggs, bunnies, seasonal collection
- Silicone pastry molds — Pavoflex, Formaflex, Chocoflex
Questions about which mold fits your production? Contact our team — we work with chocolatiers and pastry chefs across Canada.


Leave a comment
All comments are moderated before being published.
This site is protected by hCaptcha and the hCaptcha Privacy Policy and Terms of Service apply.