


Faire fondre des pépites de chocolat pour tremper ouvre des possibilités infinies de transformer des gâteries ordinaires en confiseries extraordinaires. Comprendre comment faire fondre correctement les pépites de chocolat pour les tremper garantit un chocolat lisse et brillant qui enrobera les fraises, les bretzels, les biscuits et les cake pops sans se figer, brûler ou développer une texture granuleuse qui ruinerait vos desserts soigneusement préparés.
Comprendre les types de pépites de chocolat pour le trempage
Toutes les pépites de chocolat ne fondent pas aussi bien pour le trempage. Le type de chocolat que vous choisissez a un impact significatif sur vos résultats finaux, de la consistance à l'apparence en passant par la stabilité de conservation. Les pépites de cuisson standard contiennent des stabilisants qui les aident à conserver leur forme pendant la cuisson, mais créent une consistance plus épaisse lorsqu'elles sont fondues. Le chocolat de trempage ou les fondants de confiserie sont spécifiquement formulés avec du beurre de cacao ou des huiles végétales supplémentaires qui produisent une consistance plus lisse et plus fluide, idéale pour l'enrobage.
Les pépites de chocolat mi-sucré ou au lait ordinaires fonctionnent adéquatement pour le trempage, mais peuvent nécessiter l'ajout d'huile de coco ou de shortening pour éclaircir la consistance. Ces pépites contiennent généralement des pourcentages de beurre de cacao plus faibles, ce qui donne un chocolat qui coule moins facilement et peut se fixer avec une finition légèrement terne. Les pépites de chocolat de couverture premium contiennent une teneur en beurre de cacao plus élevée – un minimum de trente-deux pour cent – et fondent en un chocolat parfaitement lisse et fluide, idéal pour des résultats de trempage professionnels.
Choisir entre le vrai chocolat et les fondants de confiserie
Le chocolat de couverture premium offre un croquant supérieur, une apparence brillante et un profil de saveur net que les chocolatiers sérieux préfèrent. Ces options de qualité professionnelle nécessitent plus d'attention pendant la fonte, mais vous récompensent avec des résultats qui ont un goût nettement meilleur que les alternatives composées. Explorez les options de chocolat de qualité pour les pépites d'origine unique et spéciales conçues spécifiquement pour le travail de confiserie.
Les fondants de confiserie ou les pépites de type wafer offrent une commodité pour les débutants, sans tempérage requis. Ces chocolats composés utilisent des huiles végétales au lieu du beurre de cacao, ce qui leur permet de durcir rapidement à température ambiante avec une finition brillante. Bien que les puristes puissent préférer la complexité de saveur du vrai chocolat, les fondants de confiserie offrent des résultats constants et fiables, parfaits pour les projets de trempage à grand volume ou lorsque vous travaillez avec des enfants.
|
Type de chocolat |
Teneur en beurre de cacao |
Point de fusion |
Tempérage requis |
Meilleures applications |
Profil de saveur |
|
Pépites de cuisson standard |
25-30% |
30-32°C |
Non |
Cuisine maison occasionnelle, biscuits |
Goût de chocolat modéré |
|
Pépites de couverture |
32-39% |
31-33°C |
Oui (pour de meilleurs résultats) |
Confiseries professionnelles, cadeaux |
Chocolat riche et complexe |
|
Fondants de confiserie/Wafers |
0% (huiles végétales) |
32-35°C |
Non |
Gâteries de fête, projets pour enfants |
Chocolat doux et léger |
|
Pépites de chocolat blanc |
28-35% |
28-30°C |
Oui |
Projets de coloration, desserts élégants |
Notes crémeuses, vanillées |
Méthode du micro-ondes : rapide et pratique
Le micro-ondes offre l'approche la plus rapide pour faire fondre les pépites de chocolat pour le trempage, bien qu'il nécessite une attention particulière pour éviter la surchauffe. Cette méthode fonctionne parfaitement pour de petites à moyennes quantités – une à trois tasses de pépites de chocolat – et donne des résultats en quelques minutes si elle est exécutée correctement.
Technique du micro-ondes étape par étape
Placez les pépites de chocolat dans un bol en verre ou en céramique allant au micro-ondes. Évitez les récipients en plastique car ils peuvent retenir les odeurs ou se déformer sous la chaleur. Les tasses à mesurer en Pyrex en verre fonctionnent particulièrement bien car leurs poignées restent froides pour une manipulation sûre. Passez au micro-ondes à cinquante pour cent de puissance par intervalles de trente secondes. Ce réglage de puissance réduite évite les points chauds qui provoquent un roussissement dans certaines zones tandis que d'autres chocolats restent non fondus.
Après chaque intervalle, retirez le bol avec précaution en utilisant des mitaines de four – le bol devient chaud même si le chocolat peut ne pas sembler fondu. Remuez soigneusement avec une spatule en caoutchouc, en raclant le fond et les côtés où le chocolat a tendance à surchauffer en premier. Même si les pépites n'ont pas visiblement fondu, remuez vigoureusement car le chocolat conserve sa forme jusqu'à ce qu'il soit physiquement perturbé. Ce phénomène trompe souvent les débutants qui ont tendance à surchauffer.
Continuez à chauffer par intervalles de vingt secondes une fois que le chocolat commence à fondre. Surveillez attentivement pendant ces dernières étapes car le chocolat peut passer de parfait à brûlé en quelques secondes. Le chocolat est prêt lorsqu'il est majoritairement lisse avec quelques petits morceaux non fondus restants – ceux-ci fondront grâce à la chaleur résiduelle. Retirez du micro-ondes et remuez vigoureusement pendant trente à soixante secondes. Les pépites solides restantes ensemencent le chocolat fondu avec des cristaux stables tandis que la chaleur résiduelle termine le processus de fusion sans chauffage supplémentaire.
Considérations spéciales pour le chocolat blanc
Pour les pépites de chocolat blanc, utilisez quarante pour cent de puissance et des intervalles de quinze à vingt secondes, car le chocolat blanc brûle plus facilement que les variétés foncées. Le chocolat blanc ne contient pas de solides de cacao pour amortir la chaleur, ce qui le rend particulièrement susceptible de brûler. La saveur brûlée ne peut pas être masquée, la prévention est donc essentielle. Ajoutez de petites quantités d'huile de coco – une cuillère à café par tasse de pépites – si la consistance semble trop épaisse pour le trempage. L'huile fluidifie le chocolat sans affecter significativement la saveur.
Méthode du bain-marie : contrôle professionnel
La méthode du bain-marie offre un contrôle supérieur de la température pour faire fondre les pépites de chocolat pour le trempage, ce qui en fait la technique préférée des chocolatiers professionnels et des pâtissiers amateurs sérieux. Cette méthode de chauffage doux évite le contact direct entre le chocolat et la source de chaleur, minimisant le risque de roussissement ou de prise. La chaleur de la vapeur réchauffe le chocolat progressivement et uniformément, vous donnant beaucoup plus de contrôle sur le processus de fusion.
Mise en place de votre bain-marie
Remplissez une casserole moyenne avec un à deux pouces d'eau et portez à frémissement doux à feu moyen. Placez un bol en verre ou en acier inoxydable résistant à la chaleur par-dessus, en vous assurant que le fond du bol ne touche pas la surface de l'eau. L'espace entre l'eau et le bol doit être d'au moins un pouce – la chaleur de la vapeur seule doit réchauffer le bol, pas le contact direct avec l'eau. Si votre bol est trop bas, retirez de l'eau de la casserole.
Ajoutez les pépites de chocolat dans le bol et remuez occasionnellement pendant qu'elles fondent. Le processus prend cinq à dix minutes selon la quantité et le type de chocolat. Le chocolat noir fond plus lentement que les variétés au lait ou blanches en raison de sa teneur plus élevée en solides de cacao. Maintenez l'eau à un frémissement doux plutôt qu'à une ébullition roulante. Une vapeur excessive crée de l'humidité qui peut éclabousser dans le bol de chocolat, provoquant une prise. Quelques bulles brisant la surface indiquent une température idéale.
Surveillance de la température pendant la fonte
Utilisez un thermomètre numérique pour surveiller la température du chocolat si vous prévoyez de le tempérer pour des résultats professionnels. Le chocolat noir ne doit pas dépasser quarante-six degrés Celsius, le chocolat au lait quarante-trois degrés et le chocolat blanc quarante degrés. Une fois que le chocolat semble majoritairement fondu avec quelques petits morceaux restants, retirez le bol de la chaleur à l'aide de mitaines de four. Continuez à remuer jusqu'à ce qu'il soit complètement lisse – la chaleur résiduelle douce termine le processus de fonte sans risque de surchauffe.
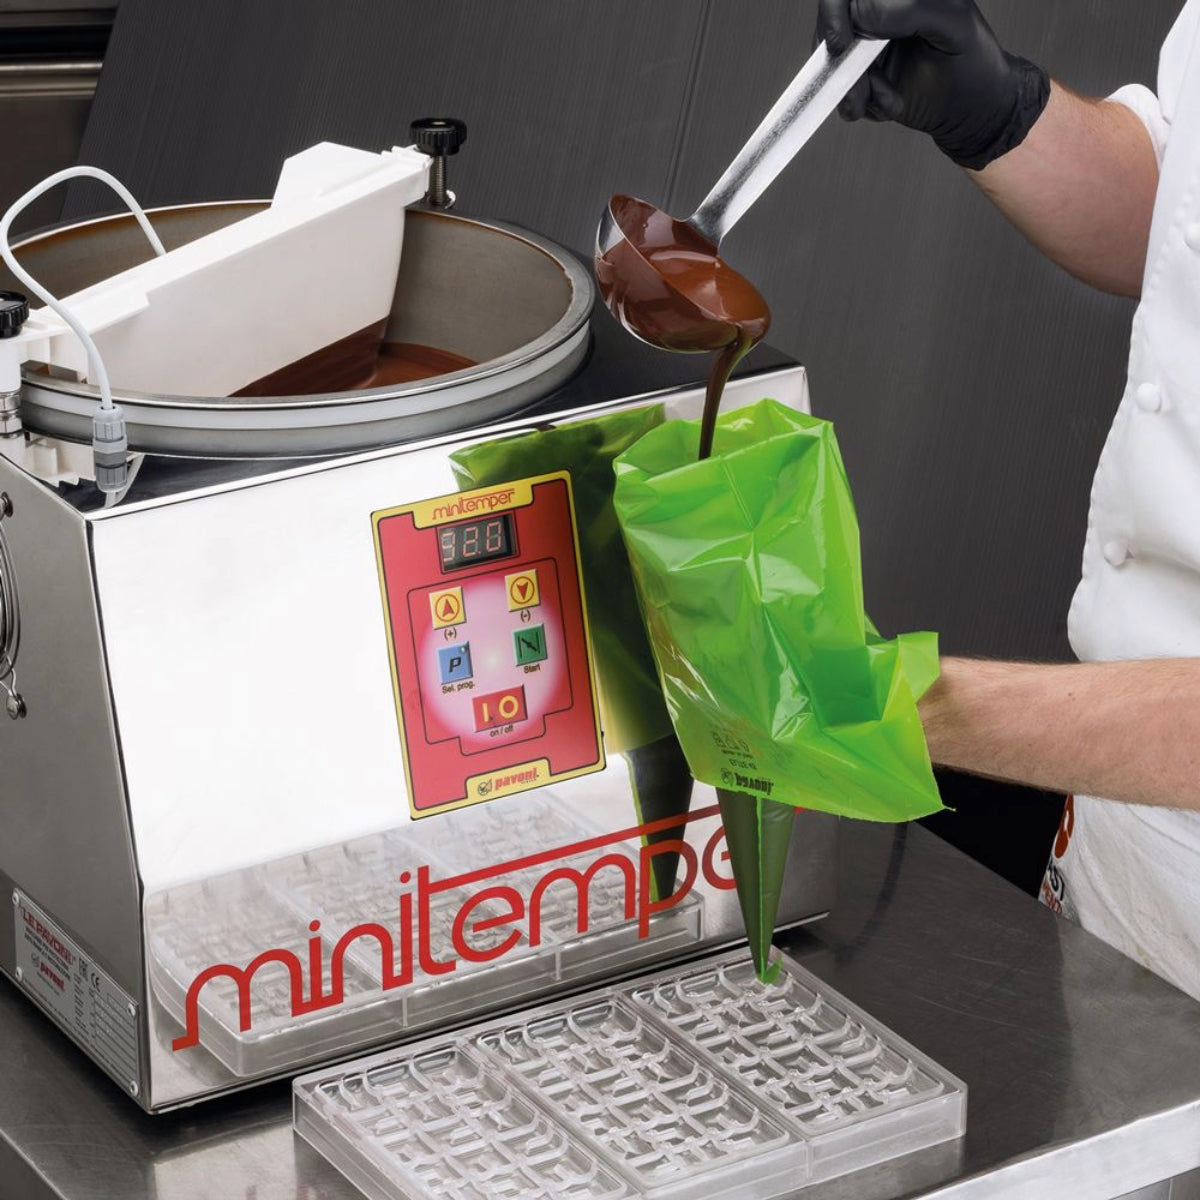
Pour les opérations professionnelles nécessitant des résultats constants sur plusieurs lots, les fondoirs à chocolat dédiés maintiennent un contrôle précis de la température automatiquement. Ces machines spécialisées éliminent les incertitudes et la surveillance constante requises avec les méthodes sur la cuisinière, vous permettant de vous concentrer sur la technique de trempage et la décoration.

Comparaison des méthodes de fonte
|
Méthode |
Temps requis |
Niveau de difficulté |
Contrôle de la température |
Taille du lot |
Idéal pour |
|
Micro-ondes |
2-4 minutes |
Débutant |
Modéré |
Petit (1-3 tasses) |
Projets rapides, lots uniques |
|
Bain-marie |
8-12 minutes |
Débutant-Intermédiaire |
Excellent |
Moyen (2-6 tasses) |
Résultats de qualité, toutes applications |
|
Fondoir professionnel |
15-20 minutes |
Débutant |
Supérieur |
Grand (plus de 2 kg) |
Production commerciale, événements |
Erreurs courantes et solutions
Problème : le chocolat se fige et devient granuleux
Ce problème frustrant survient lorsque même de petites quantités d'eau entrent en contact avec le chocolat fondu. L'humidité fait que les particules de cacao s'agglutinent, créant une pâte épaisse et granuleuse qu'il semble impossible de récupérer. La prévention exige de s'assurer que tout l'équipement est complètement sec avant utilisation. Lavez les bols et les ustensiles au moins une heure avant de fondre pour permettre un séchage complet à l'air. Même des gouttelettes d'eau résiduelles peuvent ruiner un lot entier.
Si le blocage se produit malgré les précautions, ne jetez pas le chocolat immédiatement. Ajoutez de la crème épaisse chaude ou de l'huile de coco une cuillère à soupe à la fois, en remuant vigoureusement après chaque ajout. Cela incorpore l'humidité uniformément, transformant le chocolat bloqué en une ganache lisse adaptée au trempage. Vous aurez besoin d'environ une cuillère à soupe de liquide par tasse de chocolat bloqué. Le mélange résultant n'aura pas tout à fait le même croquant que le chocolat correctement fondu, mais il fonctionne parfaitement bien pour les applications de trempage où la saveur et l'apparence importent plus que la texture.
Problème : le chocolat brûle ou développe un goût amer
Une chaleur excessive provoque le roussissement des solides de cacao, créant une saveur de brûlé désagréable et une texture granuleuse qui ne peut être réparée. Le chocolat brûlé doit être jeté – aucune quantité de mélange ou d'ingrédients supplémentaires ne peut masquer le goût amer. Utilisez toujours des réglages de puissance réduits pour la fonte au micro-ondes (cinquante pour cent maximum) ou une chaleur douce pour les méthodes sur la cuisinière. Remuez fréquemment pour répartir la chaleur uniformément et éviter les points chauds.
Surveillez les signes avant-coureurs comme le chocolat passant d'un brun brillant à un brun terne, des volutes de vapeur s'élevant du bol, ou une odeur de brûlé. Si vous remarquez l'un de ces indicateurs, retirez immédiatement le chocolat de la source de chaleur et remuez vigoureusement. Parfois, le détecter tôt permet au chocolat plus froid de faire baisser la température avant que les dommages ne deviennent irréversibles.
Problème : le chocolat fondu est trop épais pour le trempage
Les pépites de chocolat standard produisent souvent une consistance épaisse lorsqu'elles sont fondues en raison de leur faible teneur en beurre de cacao et de leurs stabilisants ajoutés. Le chocolat épais crée un enrobage inégal avec des marques de gouttes visibles et nécessite plusieurs tentatives de trempage. Diluez en ajoutant de l'huile de coco raffinée, de l'huile végétale ou du beurre de cacao à raison d'une cuillère à soupe par tasse de pépites de chocolat. Ajoutez progressivement en remuant jusqu'à obtenir la consistance désirée – vous pouvez toujours en ajouter plus, mais vous ne pouvez pas retirer l'excès d'huile une fois incorporé.
Utilisez des racloirs souples de qualité pour un brassage doux sans rayer les bols ni introduire de bulles d'air. Le bord flexible épouse les courbes du bol, assurant un mélange complet et une répartition uniforme de l'huile. Testez la consistance en trempant une cuillère dans le chocolat – elle doit enrober le dos de la cuillère en douceur et s'écouler en un flux constant sans se briser en gouttelettes.
Problème : le chocolat blanc ne fond pas en douceur
Le chocolat blanc ne contient pas de solides de cacao et brûle plus facilement que les variétés foncées ou au lait. L'absence de solides de cacao signifie qu'il n'y a pas de tampon contre la chaleur, et les protéines de lait roussissent rapidement en cas de surchauffe. Utilisez les réglages de chaleur les plus bas et des intervalles de chauffage plus courts lorsque vous travaillez avec du chocolat blanc. Pour la méthode au micro-ondes, utilisez une puissance de quarante pour cent et des intervalles de quinze secondes maximum.
Ajoutez de l'huile de coco plus généreusement avec du chocolat blanc – il faut généralement deux cuillères à soupe par tasse pour une consistance de trempage optimale, contre une cuillère à soupe pour le chocolat noir. L'huile supplémentaire compense la faible teneur en beurre de cacao de la plupart des pépites de chocolat blanc. Remuez constamment pendant la fonte pour répartir la chaleur et éviter que toute portion ne surchauffe.
Ajouter de la couleur et de la saveur au chocolat fondu
Transformez des pépites de chocolat fondu de base en créations personnalisées grâce à des ajouts stratégiques de couleur et de saveur. Cette personnalisation vous permet d'adapter les thèmes de fête, les célébrations saisonnières ou les préférences personnelles tout en conservant le délicieux goût et la texture lisse du chocolat.
Utiliser des colorants alimentaires professionnels
La gamme complète de colorants professionnels Pavoni Italia propose des poudres liposolubles qui s'intègrent parfaitement dans le chocolat blanc sans altérer la texture ni provoquer de blocage. Ces colorants de qualité professionnelle sont spécifiquement formulés pour le travail du chocolat, contrairement aux colorants alimentaires standard qui contiennent de l'eau qui provoque un blocage immédiat.
Ajoutez les poudres colorantes avant la fonte pour une distribution uniforme. Commencez par de petites quantités – un quart de cuillère à café par tasse – et augmentez progressivement jusqu'à obtenir l'intensité désirée. Les colorants alimentaires à base d'huile fonctionnent également très bien, offrant des teintes vives sans compromettre la consistance du chocolat. Les colorants à base d'eau provoquent un blocage et doivent être entièrement évités lorsque vous travaillez avec du chocolat.
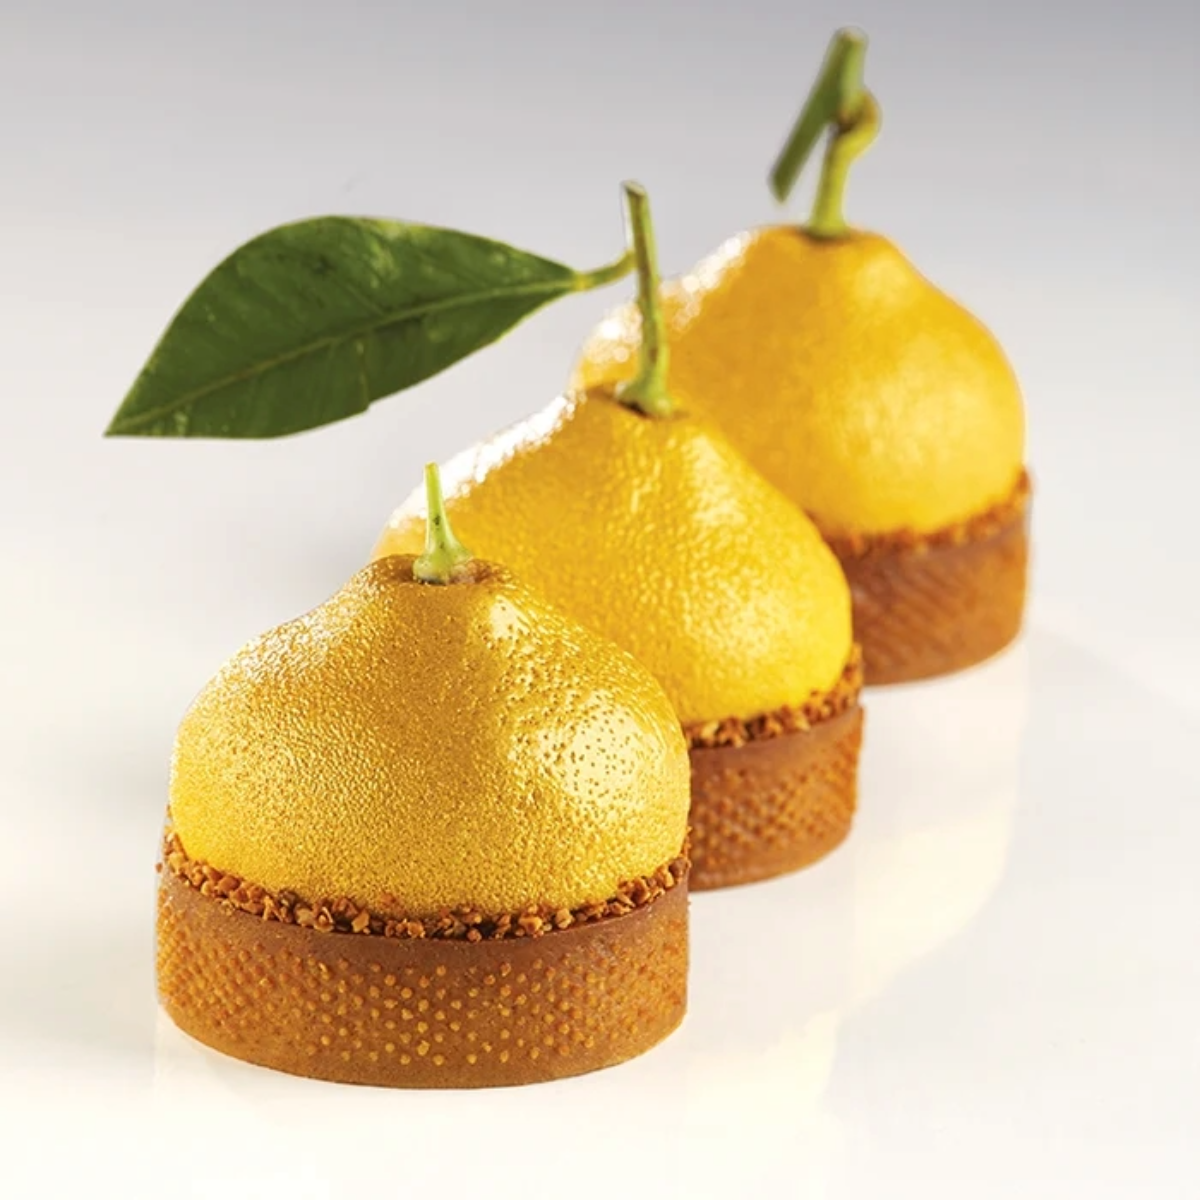
Pour des finitions métalliques qui captent magnifiquement la lumière, parcourez la poudre métallisée or brillant qui crée des effets visuels époustouflants parfaits pour les mariages, les anniversaires ou les événements haut de gamme. Ces poudres métalliques comestibles peuvent être mélangées directement dans du chocolat blanc fondu ou saupoudrées sur du chocolat durci pour différents effets esthétiques.
Techniques avancées de coloration par pulvérisation
Les touches finales professionnelles incluent des applications par pulvérisation utilisant des systèmes d'aérographe KREA Swiss. Ces outils de précision appliquent du beurre de cacao coloré ou des sprays métallisés sur les articles trempés pour des effets visuels époustouflants impossibles à obtenir par simple mélange. La technologie sans air chauffée maintient le chocolat à une viscosité optimale sans surveillance manuelle constante de la température, offrant une couverture constante sur l'ensemble des cycles de production.
Les techniques de pulvérisation vous permettent de créer des effets de dégradé, des motifs au pochoir ou des contrastes de couleurs dramatiques qui transforment de simples friandises trempées en pièces maîtresses impressionnantes. Appliquez les couleurs en spray après que le chocolat ait durci mais avant de servir pour une meilleure adhérence et apparence.
|
Méthode de coloration |
Quand ajouter |
Intensité de la couleur |
Impact sur la texture |
Meilleures applications |
|
Poudre liposoluble |
Avant la fonte |
Élevée, personnalisable |
Aucun |
Chocolat coloré uniforme |
|
Liquide à base d'huile |
Après la fonte |
Très élevée |
Léger amincissement |
Couleurs vives et solides |
|
Poudre métallique (mélangée) |
Avant la fonte |
Modérée |
Aucun |
Léger éclat |
|
Poudre métallique (saupoudrée) |
Après la prise |
Élevée |
Aucun |
Fini métallique spectaculaire |
|
Couleur pulvérisée |
Après la prise |
Variable |
Aucun |
Motifs professionnels, dégradés |
Techniques de trempage parfaites
Une fois que vous maîtrisez la fonte des pépites de chocolat pour le trempage, une technique de trempage appropriée assure une belle présentation sans accumulation excessive de chocolat ni coulures inesthétiques. La façon dont vous trempez les articles est aussi importante que la façon dont vous préparez le chocolat – une mauvaise technique gaspille le chocolat et crée des résultats salissants et non professionnels.
Préparation de votre poste de trempage
Transférez le chocolat fondu dans un récipient étroit et profond qui peut accueillir vos articles à tremper avec un minimum de gaspillage de chocolat. Les récipients hauts et étroits nécessitent moins de profondeur de chocolat que les bols larges et peu profonds tout en assurant une submersion adéquate. Les tasses à mesurer en verre conviennent parfaitement aux fraises et aux bâtonnets de bretzels, tandis que les bols à céréales plus larges conviennent aux biscuits et aux articles plus grands.
Disposez des plaques de cuisson tapissées de papier sulfurisé à portée de main pour y déposer les articles fraîchement trempés. Ayez tous les éléments décoratifs – vermicelles, noix, filets, feuilles de transfert – préparés et accessibles avant de commencer le trempage. Le chocolat durcit rapidement, ne vous laissant que trente à quatre-vingt-dix secondes pour appliquer les décorations avant que la surface ne se croûte.
Trempage de différents types d'aliments
Pour les fraises et les fruits similaires, tenez-les par la tige ou les feuilles et trempez-les légèrement inclinées aux trois quarts de la profondeur. Soulevez-les tout droit et secouez doucement pour enlever l'excès de chocolat – trois secousses rapides vers le bas libèrent la plupart des coulures sans déplacer l'enrobage. Tournez légèrement le poignet en plaçant la fraise sur le plateau tapissé de papier sulfurisé. Ce mouvement de torsion empêche la formation d'une flaque à la base qui crée une tache plate et une apparence inesthétique.
Pour les biscuits, les bretzels ou autres articles plats, utilisez une fourchette à tremper ou une fourchette de table ordinaire pour immerger complètement l'article. Glissez la fourchette sous l'article, puis plongez-le dans le chocolat jusqu'à ce qu'il soit complètement recouvert. Soulevez lentement et tapotez doucement la fourchette sur le bord du bol trois à quatre fois pour enlever l'excès de chocolat. L'action de tapotement permet au chocolat de s'égoutter dans le bol tout en maintenant un enrobage uniforme sur votre article.
Faites glisser l'article trempé sur du papier sulfurisé à l'aide de spatules coudées en plastique pour un démoulage propre sans perturber l'enrobage de chocolat. La lame inclinée glisse facilement sous les articles trempés tandis que le manche coudé maintient votre main à l'écart du chocolat humide.
Application des décorations
Appliquez les éléments décoratifs – vermicelles, noix hachées, filets, paillettes comestibles – immédiatement après le trempage, pendant que le chocolat est encore humide. Une fois que le chocolat commence à durcir, les décorations n'adhéreront pas correctement et glisseront ou sembleront placées au hasard. Travaillez rapidement mais délibérément, en positionnant chaque décoration intentionnellement plutôt que de les disperser au hasard.
Pour les motifs en filet utilisant du chocolat contrastant, transférez le chocolat fondu dans des poches à douille jetables avec une petite ouverture. Tenez la poche à douze pouces au-dessus des articles trempés et déplacez-la en zigzag rapide ou en mouvement circulaire pour des motifs d'aspect professionnel. Entraînez-vous sur du papier sulfurisé avant de tenter sur les articles trempés réels pour développer un contrôle stable de la main.

Conservation et durée de conservation
Les chocolats trempés correctement conservés maintiennent une qualité optimale pendant une à trois semaines, selon le type de chocolat et les conditions de conservation. Des facteurs environnementaux tels que la température, l'humidité et l'exposition à la lumière ont un impact significatif sur la durée de fraîcheur et d'attrait de vos friandises trempées dans le chocolat.
Directives de conservation à température ambiante
Les articles trempés dans du chocolat non tempéré nécessitent une réfrigération dans la plupart des climats et doivent être consommés dans la semaine pour une saveur et une texture optimales. Le chocolat peut développer une « fleur » – des traînées ou des taches blanches – lorsqu'il est sorti du réfrigérateur en raison de la condensation de l'humidité. Laissez les articles réfrigérés atteindre complètement la température ambiante avant de les déballer ou de les servir pour éviter la formation de condensation qui ruine l'apparence du chocolat.
Les friandises trempées dans du chocolat tempéré se conservent à température ambiante fraîche entre 18 et 21 degrés Celsius dans des récipients hermétiques avec du papier sulfurisé entre les couches. Empilez les articles avec soin pour éviter que les décorations du dessus n'appuient sur d'autres morceaux. Gardez les récipients à l'abri de la lumière directe du soleil, des sources de chaleur comme les fours ou les plaques de cuisson, et des aliments à forte odeur que le chocolat absorbe facilement. Le chocolat agit comme une éponge à saveurs, absorbant les odeurs d'ail, d'oignon ou de poisson des aliments à proximité.
Options de présentation professionnelle
Pour une présentation cadeau ou des ventes au détail, disposez les articles trempés dans des boîtes décoratives tapissées de papier de soie ou de caissettes à bonbons. Des sacs en cellophane individuels noués avec un ruban assorti créent une apparence professionnelle parfaite pour les cadeaux de fête ou les ventes en boutique. Les vitrines professionnelles mettent magnifiquement en valeur les créations tout en les protégeant de la manipulation, de la poussière et des dommages environnementaux.
Les vitrines transparentes permettent aux clients ou aux invités d'admirer votre travail sans toucher le délicat enrobage de chocolat. L'environnement clos maintient une température et une humidité stables, prolongeant la durée de conservation par rapport à une exposition à l'air libre.
Techniques de décoration avancées
Transformez de simples friandises trempées en confiseries époustouflantes grâce à des techniques de décoration avancées qui démontrent des compétences raffinées et une vision artistique. Ces méthodes nécessitent de la pratique mais créent un impact visuel spectaculaire qui justifie l'effort supplémentaire.
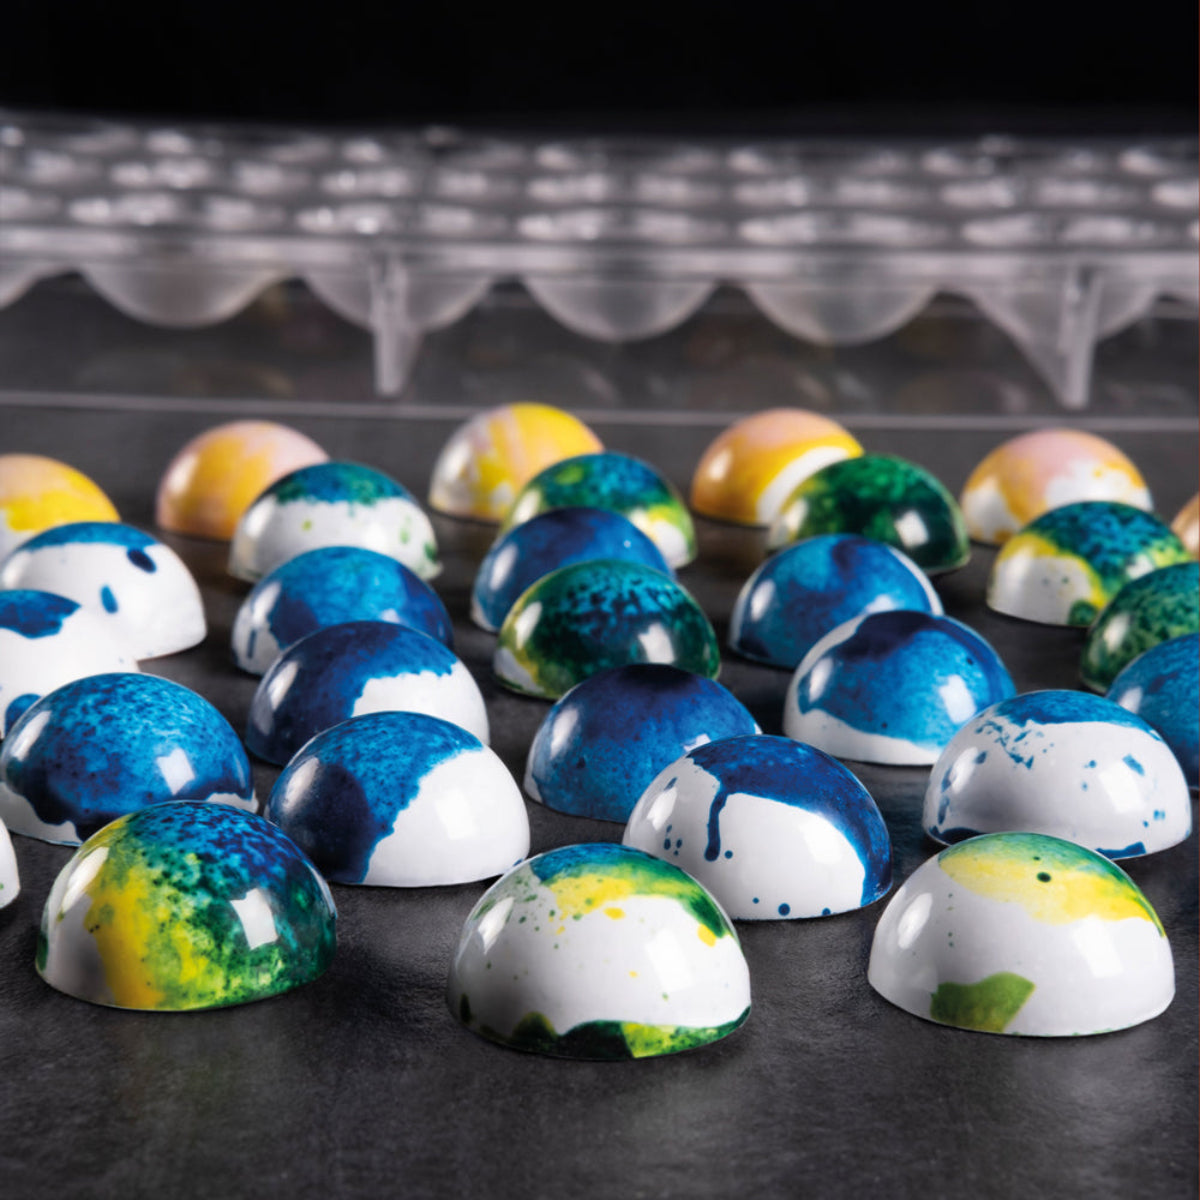
Création d'effets marbrés
Les effets marbrés combinent deux couleurs de chocolat pour une apparence sophistiquée. Trempez l'article dans la couleur primaire – généralement une teinte plus foncée – en laissant l'excédent s'égoutter dans le bol. Immédiatement, arrosez le chocolat contrastant sur la surface en un motif aléatoire à l'aide d'une poche à douille ou d'une cuillère. Pendant que les deux chocolats sont encore humides, faites glisser un cure-dent ou une brochette à travers les lignes de filet dans une direction perpendiculaire, créant un motif marbré en plumes.
Travaillez rapidement car le chocolat commence à durcir en soixante secondes. Les couleurs contrastantes doivent être fluides pour que l'effet marbré fonctionne correctement. Entraînez-vous sur du papier sulfurisé jusqu'à ce que vous développiez le sens du timing et de la pression nécessaires pour des résultats attrayants.
Utilisation de feuilles de transfert en chocolat
Les feuilles de transfert de chocolat confèrent des motifs complexes sans effort, sans compétences artistiques ni mains stables. Appuyez la feuille contre le chocolat fraîchement trempé, le côté motif vers le bas, en lissant doucement pour assurer un contact complet. Utilisez une légère pression – trop de force fait sortir le chocolat des bords.
Laissez le chocolat durcir complètement à température ambiante. Le durcissement prend quinze à trente minutes selon le type de chocolat et la température ambiante. Ne pas réfrigérer car un choc thermique peut faire adhérer le transfert de manière permanente ou estomper le motif. Une fois que le chocolat a complètement durci, décollez lentement la feuille d'un coin pour révéler un motif professionnel qui semble peint à la main.
Les feuilles de transfert sont disponibles dans des centaines de motifs, des formes géométriques aux thèmes saisonniers en passant par les volutes élégantes. Parcourez les options de feuilles de transfert pour trouver des motifs qui correspondent au thème de votre événement ou à votre esthétique personnelle.
Ajouter des garnitures de chocolat
Créez des copeaux ou des boucles de chocolat à l'aide de peignes de décoration professionnels pour garnir les articles trempés. Appuyez doucement les copeaux dans le chocolat humide pour une apparence texturée qui ajoute un intérêt visuel et une finition sophistiquée. Disposez les boucles artistiquement sur les fraises trempées pour une présentation dimensionnelle qui se photographie magnifiquement.
Pour un contraste de texture supplémentaire, envisagez des fruits lyophilisés écrasés, des noix grillées finement hachées ou des flocons de noix de coco pressés dans le chocolat humide. Ces ajouts apportent une complexité de saveur au-delà du simple enrobage de chocolat tout en créant une apparence professionnelle qui augmente la valeur perçue.
Maîtriser l'art de faire fondre des pépites de chocolat pour le trempage ouvre des possibilités créatives illimitées pour transformer des friandises ordinaires en confiseries mémorables. Que vous utilisiez des méthodes rapides au micro-ondes pour des projets occasionnels ou des équipements professionnels pour des applications commerciales, comprendre les méthodes de fusion appropriées, le contrôle de la température et les techniques de trempage garantit des résultats cohérents et magnifiques à chaque fois. Les compétences que vous développez par la pratique se traduisent par d'innombrables applications, de la simple préparation de collations aux présentations de desserts élaborées. Investissez dans du chocolat de qualité, des outils professionnels et des options de coloration spécialisées auprès de Zucchero Canada pour élever vos projets de trempage de chocolat de simples collations à des confiseries impressionnantes qui mettent en valeur votre expertise croissante et votre souci du détail.
Références :
Greweling, P. (2024). Chocolates and confections: Formula, theory, and technique for the artisan confectioner (3e éd.). Rye Wiley & Sons.
Chocolate Academy. (2023). Fundamental techniques in chocolate work. Barry Callebaut Academy.
Pavoni Italia. (2024). Professional guide to chocolate coloring and decoration. https://pavonitalia.com/en/collections/professional-collezioni-colori-e-materie-prime
Zucchero Canada. (2024). Complete guide to professional chocolate tools. https://zuccherocanada.ca/


Laisser un commentaire
Tous les commentaires sont modérés avant d'être publiés.
Ce site est protégé par hCaptcha, et la Politique de confidentialité et les Conditions de service de hCaptcha s’appliquent.